


Abrites Diagnostics for Porsche User Manual

Abrites Diagnostics
for Porsche


User manual
version 3.1
www.abrites.com
www.abrites.com

Important notes
Warranty
The Abrites software and hardware products are developed, designed and manufactured by Abrites Ltd. During the production process we comply to all safety and quality regulations and standards, aiming at highest production quality. The Abrites hardware and software products are designed to build a coherent ecosystem, which effectively solves a wide range of vehicle-related tasks, such as:
All software and hardware products by Abrites Ltd. are copyrighted. Permission is granted to copy Abrites software files for your own back-up purposes only. Should you wish to copy this manual or parts of it, you are granted permission only in case it is used with Abrites products, has “Abrites Ltd.” written on all copies, and is used for actions that comply to respective local law and regulations.
You, as a purchaser of Abrites hardware products, are entitled of a two-year warranty. If the hardware product you have purchased has been properly connected, and used according to its respective instructions, it should function correctly. In case the product does not function as expected, you are able to claim warranty within the stated terms. Abrites Ltd. is entitled to require evidence of the defect or malfunction, upon which the decision to repair or substitute the product shall be made.
There are certain conditions, upon which the warranty cannot be applied. The warranty shall not apply to damages and defects caused by natural disaster, misuse, improper use, unusual use, negligence, failure to observe the instructions for use issued by Abrites, modifications of the device, repair works performed by unauthorized persons. For example, when the damage of the hardware has occurred due to incompatible electricity supply, mechanical or water damage, as well as fire, flood or thunder storm, the warranty does not apply.
Each warranty claim is inspected individually by our team and the decision is based upon thorough case consideration.
Read the full hardware warranty terms on our website.
Abrites Diagnostics for Porsche User Manual
2
www.abrites.com

Copyright information
Safety information
Copyright:
Notices:
The Abrites products are to be used by trained and experienced users in diagnostics and reprogramming of vehicles and equipment. The user is assumed to have a good understanding of vehicle electronic systems, as well as potential hazards while working around vehicles. There are numerous safety situations that cannot be foreseen, thus we recommend that the user read and follow all safety messages in the available manual, on all equipment they use, including vehicle manuals, as well as internal shop documents and operating procedures.
Some important points:
Block all wheels of the vehicle when testing. Be cautious when working around electricity.
In case any technical difficulties occur, please contact the
Abrites Support Team by email at support@abrites.com.
Abrites Diagnostics for Porsche User Manual
3
Table of contents
www.abrites.com


Abrites Diagnostics for Porsche User Manual
4
Table of contents
www.abrites.com
Abrites Diagnostics for Porsche User Manual
5
3.3.3.4 Coding – Automatic coding from file
3.3.6 Read Diagnostic Trouble Codes
3.3.7 Clear Diagnostic Trouble Codes
3.3.8 Control Unit Replacement
3.4.1 Special functions with “Instrument Cluster CAN”
3.4.1.1. 911 997, Boxster 987 and Cayman
3.4.1.1.1 “Reset service interval”
3.4.1.1.2 “Oil level measurement”
3.4.1.1.3 “Read/Write ConfData, Read mileage value, Reset cluster “
3.4.1.1.4 “Events” , “Erase event memory”
3.4.1.2 Panamera (2010-2012) and Cayenne (2011+)
3.4.1.2.1 “Reset service interval”
3.4.1.2.2 “Write maintenance interval”
3.4.1.2.3 “Change maintenance interval”
3.4.2 Special functions with “Instrument Cluster K-Line”
Table of contents
www.abrites.com
Abrites Diagnostics for Porsche User Manual
6
3.4.3.6 Change Immobilizer code in ECU
3.4.4. Special function “Dump Tool”
3.4.4. Special function “Dump Tool”
3.4.5.Special function “Key learning”
3.4.5.1 Teach keys - GT2 996, GT3 996, 911 996, Boxster 986, Carrera GT
3.4.5.2 Teach remote control - GT2 996, GT3 996, 911 996, Boxster 986, Carrera GT
3.4.5.3 Teach keys – Cayenne (-2010)
3.4.5.4 Program dealer key – Cayenne (-2010)
3.4.5.5 Teach keys - 911 997, Boxster 987, Cayman
3.4.5.6 Program dealer key on 911 997, Boxster/Cayman 987
3.4.5.7 “All keys lost” function for 911 997, Boxster/Cayman 987
3.4.5.9 Teach key Panamera, Cayenne (2011+), Boxster 981, 911 991, Macan
3.4.6 Special function “Kessy/immobilizer functions”
3.4.6.1 Teach Kessy/immobilizer – Cayenne (-2010)
3.4.6.2 Teach ELV – Cayenne (-2010)
3.4.6.3 Teach control unit – Boxster 987, 911 997, Cayman (-2010)
3.4.6.4 Teach electronic steering column lock – Boxster 987, 911 997, Cayman (-2010)
Table of contents
www.abrites.com
Abrites Diagnostics for Porsche User Manual
7
3.4.6.5 Teach control unit – Boxster 986, 911 996, Carrera GT
3.4.6.6 Activation state memory – Boxster 986, 911 996, Carrera GT
3.4.6.7 Erase activation state memory – Boxster 986, 911 996, Carrera GT
3.4.6.8 Events– Boxster 986, 911 996, Carrera GT
3.4.6.9 Erase Events memory – Boxster 986, 911 996, Carrera GT
3.4.7 Special function “Guided functions”
3.7 Special Function “Read/Update ConfigData”
5.1 Porsche Cayenne gasoline engines – ECU wakeup fuses
www.abrites.com

Abrites Diagnostics for Porsche User Manual
List of revisions
17.10.2011
21.05.2013
17.09.2016
27.09.2017
07.05.2010
13.09.2013
22.03.2017
30.11.2017
01.08.2014
03.11.2015
01.10.2015
02.10.2013
3.3 Standard
diagnostic requests
3.3 Standard
diagnostic requests
3.3.4. Coding
3.5
Chapter 3.4.7
Guided functions
3.3 Standard
diagnostic requests
Function “All
keys lost” - 911 997, Boxster/Cayman 987
Special function “Instrument Cluster CAN”
1.0
2.1
2.7
2.9
2.0
2.2
2.8
3.0
2.4
2.6
2.5
2.3
Release version of the
document
Release version of the
document
Document update and revision for latest SW version
Read Transponder/Immo data from a working key for 911 997, Boxster/Cayman 987
Document update and revision for latest SW version
Added Component
protection
Description of different
interface for some units
Description of different
interface for some units
Chapters Added
Service interval reset for Panamera and Cayenne 958 models, Read/Write configuration data, Read mileage value for 911 997, Boxster 987
and Cayman models
Document update and revision for latest SW version
Document update and revision for latest SW version Panamera 970, 991, Boxter/ Cayman 981, Cayenne 92A, Macan 95B keys by dump.
Document update and revision for latest SW version Panamera key by
dump added
Document update and
revision for latest SW version
Date
Chapter
Description
Revision
8
www.abrites.com

Abrites Diagnostics for Porsche User Manual
List of revisions
30.11.2017
20.01.2018
3.6
3.6
3.0
3.1
Added Immo V adaptation
Added Special Function “Read/Update ConfigData”
Date
Chapter
Description
Revision
9
www.abrites.com

Abrites Diagnostics for Porsche User Manual
1. Introduction
10
“ABRITES Diagnostics for Porsche” is a Windows PC based diagnostic software for the Porsche
vehicles. With this tool you’re able to learn new keys to the car. The “ABRITES Diagnostics for
Porsche” also provides basic diagnostic capabilities for Porsche vehicles.
www.abrites.com

Abrites Diagnostics for Porsche User Manual
2. Installation
2.1 Installing USB Interface drivers
The drivers are installed automatically when installing the software.
In case of some problem with the drivers you might download latest drivers from www.ftdichip.com
2.2 Installing “ABRITES Diagnostics for Porsche”
The “ABRITES Diagnostics for Porsche” is contained into the installation package, so please run the setup program. It will create a program group in the start menu and optionally a desktop icon.
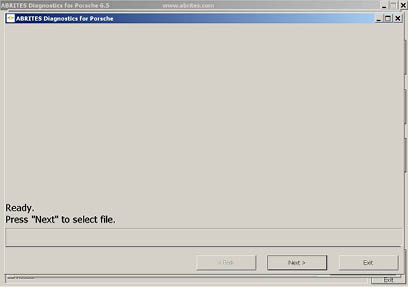
Now you are ready to start the “ABRITES Diagnostics for Porsche” When starting the software, there is a splash screen appeared, where the connection with the hardware is examined. If no problem appear, then a message “Connection OK” should appear!
ATTENTION:
Make sure you are running the “ABRITES Diagnostics for Porsche” from its folder. If you are using a shortcut to the “ABRITES Diagnostics for Porsche”, please be sure that the “working folder” parameter is set to the folder where the executable is placed! If the “working folder” of the shortcut is not set the K-Line may function incorrectly.
11
www.abrites.com

Abrites Diagnostics for Porsche User Manual
3. DIAGNOSTIC WITH “ABRITES DIAGNOSTICS FOR PORSCHE”
The “ABRITES Diagnostics for Porsche” consists basically of three parts:
All devices, which can be installed into the selected vehicle model are listed in the main screen of the “ABRITES Diagnostics for Porsche”. If you want to connect to some device please double click on it. The “ABRITES Diagnostics for Porsche” will try to connect to the device using some of the following protocols:
You can choose which of these protocols to try when attempting to connect as described in the
“Configuration” section.
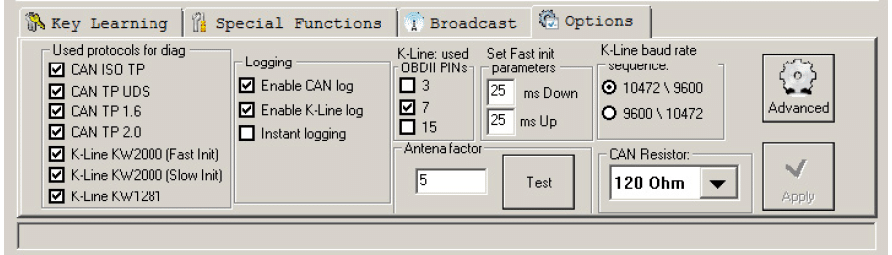
3.1 Configuration
The “ABRITES Diagnostics for Porsche” can be configured by pressing the “Options” button from the main screen. The following dialog is displayed:
NOTE: changes regarding interface detection and timing parameters which you made in this dialog will be applied after restarting the application.
12
www.abrites.com
Abrites Diagnostics for Porsche User Manual
3.1.1 Used protocols
The meaning of the check-boxes is as follows:
NOTE: These check-boxes are used for configuring only the used protocols when trying to connect to the device in order to perform standard diagnostic requests, they are not applied when auto-scanning devices.
3.1.2 Interface detection
Normally the “ABRITES Diagnostics for Porsche” USB Interface is recognized automatically.
3.1.3 K-Line baud rate settings
When trying to connect to the device over K-Line the Diagnostics will try to connect to it using one baud rate and if it doesn’t succeed it will switch to another baud rate and try again. There are two baud rate values currently used – 10427 and 9600. Using the “10472 \ 9600” and “9600 \ 10247” radio-buttons within the options dialog one can set the order in which these two baud rate values will be used.
If “10472 \ 9600” is selected, then first the Diagnostics will try to connect to the device over K-Line using baud rate 10472 and if it doesn’t succeed, it will switch to 9600 and try again with it. If “9600 \ 10472” is selected, then first the Diagnostics will try to connect to the device using baud rate 9600 and if it doesn’t succeed it will switch to 10472 and try again with it.
ATTENTION: Some device working on baud 9600 cannot be waked up if they are first tried on baud 10472, so if you cannot connect to device through the K-Line, try to change the options so first to try on 9600.
13
www.abrites.com
Abrites Diagnostics for Porsche User Manual
3.1.4 Timing parameters
The protocols running under K-Line require very precise byte timing. Since Windows is not a real-time operating system, these times are not always respected, so it is possible that the communication with some devices is unstable, or it is not possible to connect. In such cases you can try to change some of the times timing parameters from the “Advanced” button.
The timing parameters have the following meaning:
3.1.5 K-Line PINs
Normally the K-Line is output on PIN7 of the OBDII connector. But some models (e.g. Porsche Cayenne 2004) the K-Line with some units might be on PIN3 or PIN15. For that reason there is a option on which PINs to try to connect to the units.
ATTENTION: If you check all PINs to be examined (i.e. PIN3, PIN7, PIN15) then when scanning for units the time will will be significantly increased. For that reason by default only PIN7 is selected.
3.1.6 CAN resistance
According the CAN specification there should be a resistance between CAN-Low and CANHigh. Normally the gateway has this resistance, but if you want to connect on some device on the table then you should use that resistance. For that reason there is a option what resistance to use – None, 75 Ohme, 100 Ohm, 120 Ohm, or 10 Kiloohme. By default 120 Ohm is used. Normally you should don’t have any problems, but if some problem appear you can try to change the CAN resistance.
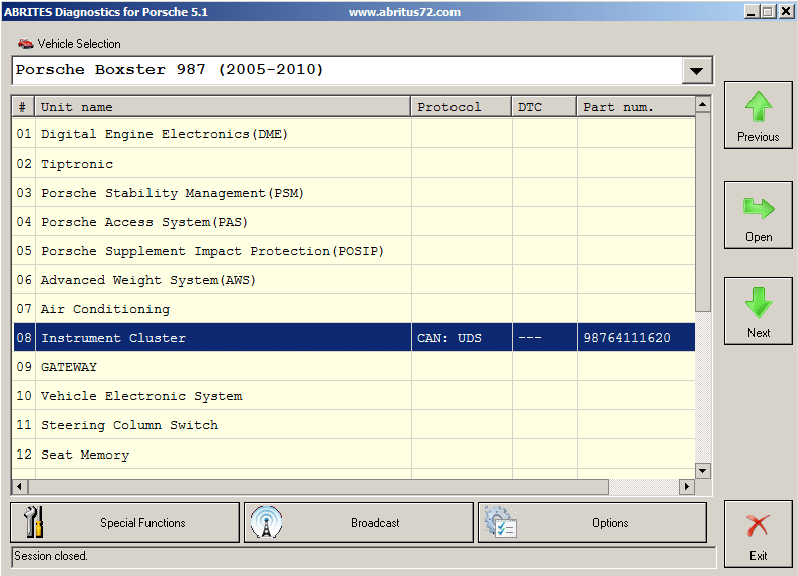
3.2 Scanning units
On the main screen of the “ABRITES Diagnostics for Porsche” the user is able to select a certain vehicle model configuration from the “Vehicle selection:” combo-box. A list of the devices which can be installed into this car type is displayed below.
For to connect to a certain device the user have to double-click on it or to select it and press “Open”.
14
www.abrites.com
Abrites Diagnostics for Porsche User Manual
Pressing the “Scan all” button from the “Broadcast” panel will attempt to connect to each device currently displayed in the list. Depending on the configuration options only the selected protocols will be used when scanning for the devices.
For all devices, which the “ABRITES Diagnostics for Porsche” finds, a detailed information is displayed in the main screen. For each device the following information is shown:
Since clearing of the DTCs for all existing devices is one of the main diagnostic operations, and broadcast requests for clearing DTCs are not accepted from all units, there is a possibility to scan all devices and if connection to the device is possible, then its DTCs are cleared. This is made by pressing the “Clear all DTCs” button from the “Broadcast” panel. Once again, the protocols used to connect to the devices are specified in the configuration options.
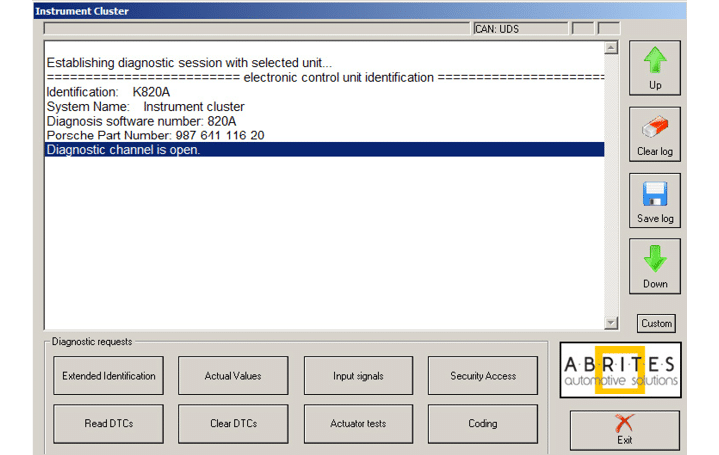
3.3 Standard diagnostic requests
When double-clicking on the desired device in the main “ABRITES Diagnostics for Porsche” window, you connect to the device to proceed standard diagnostic requests. The following dialog is opened (example with Instrument cluster Porsche Boxster (987)):
This dialog provides you the possibility to execute the following diagnostic functions:
15
www.abrites.com
Abrites Diagnostics for Porsche User Manual
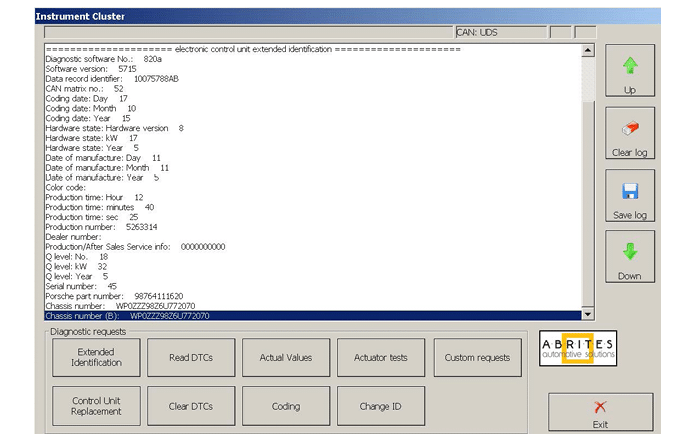
3.3.1 Extended Identification
“Extended Identification” will provide you the device identification and VIN number if present.
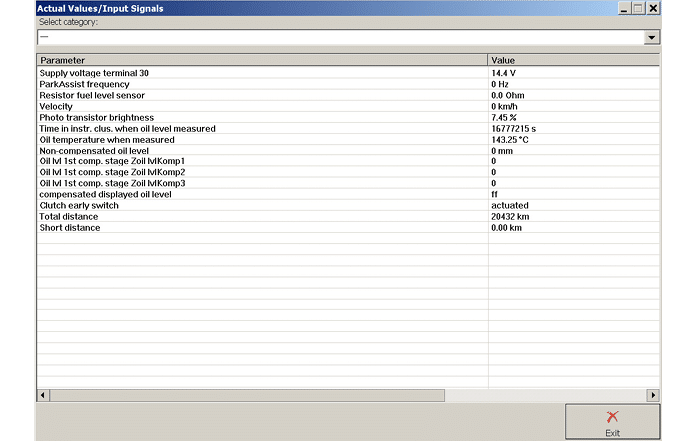
3.3.2 Actual values
This dialog will provide you information for the actual values of some of the main characteristics of the corresponding electronic control module.
Here is an example for the actual values read for the Instrument Cluster of Boxster 987 (2005 – 2010).
16
www.abrites.com
Abrites Diagnostics for Porsche User Manual
3.3.3 Coding
There are several coding functions available depending on vehicle model:
The “Automatic coding”, “Manual coding” and Automatic coding from file” functions are only available
for units communicating with UDS CAN TP.
3.3.3.1 Coding - Settings
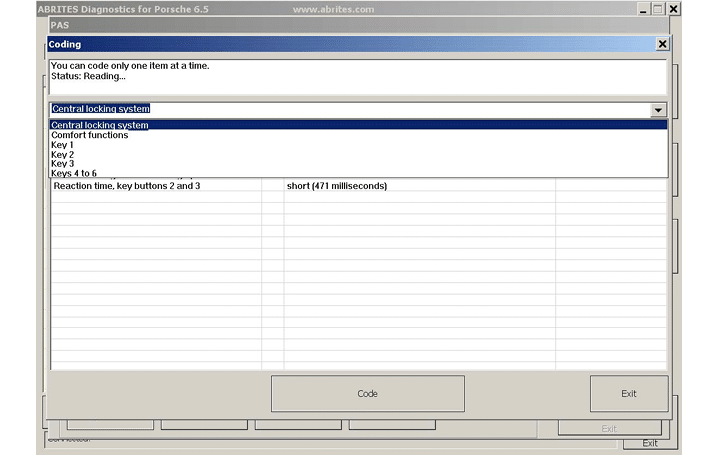
This dialog will provide you information for the coding characteristics of the corresponding Electronic Control Module and also the opportunity to modify these characteristics.
Here is an example for the coding information of the vehicle model Boxster 987 (2005-2010) Porsche Access System (PAS) unit:
In the example above, you can select from several coding option categories: “Central locking system”, “Comfort functions”, “Key 1”,“Key 2”,“Key 3”,“Key 4 to 6”.
17
www.abrites.com
Abrites Diagnostics for Porsche User Manual
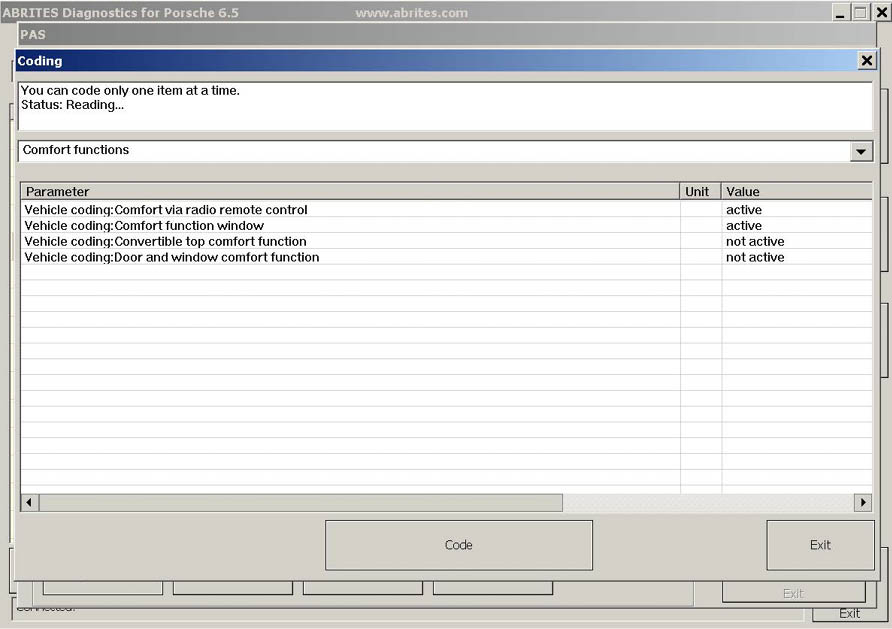
When you select certain category the options belonging to this category are listed below.
Here is an example with “Comfort functions” category selected:
You can modify only one item at a time.
Click on the desired item into column “Value” and you will be able ether to select from a list of possible values or to write down a certain input.
By pressing button “Code” the selected item value will be modified.
18
www.abrites.com
Abrites Diagnostics for Porsche User Manual
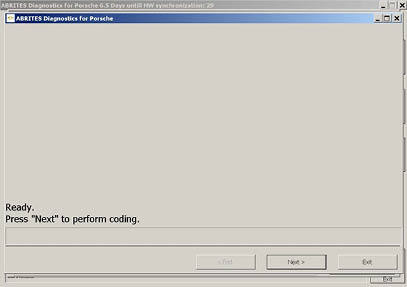
3.3.3.2 Coding – Automatic coding
Use this function when unit is not coded or coding is faulty (there is usually DTC indicating this). This function will calculate unit’s default coding according to vehicle configuration read from vehicle and write it into the unit.
You can use “Coding – Settings” after that to change user specific settings.
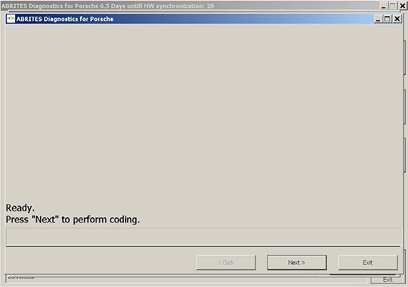
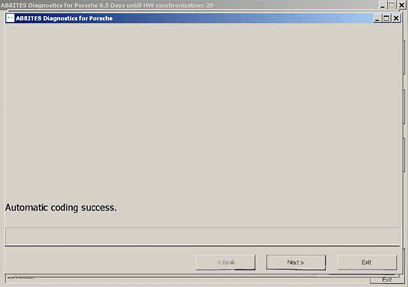
After you select “Automatic coding” and press “Next” the program will read vehicle configuration, calculate unit’s default coding (have in mind that you will need internet connection for that) and if everything is OK, guide you to the page where you can select to execute the coding or not by pressing
“Next” or “Exit” (“Next” will do the coding).

19
www.abrites.com
Abrites Diagnostics for Porsche User Manual
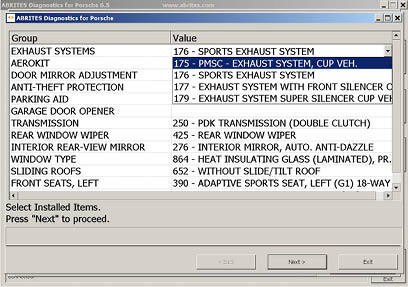
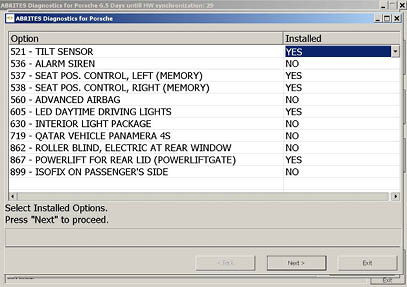
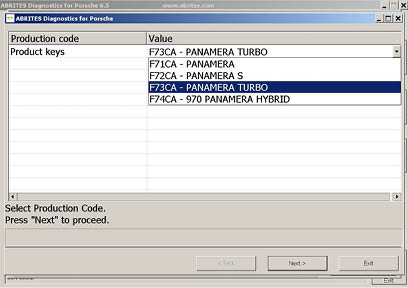
3.3.3.3 Coding – Manual coding
Use this function when unit is not coded or coding is faulty (there is usually DTC indicating this). This function will calculate unit’s default coding according to vehicle configuration set from user and write it into the unit.
You can use “Coding – Settings” after that to change user specific settings.
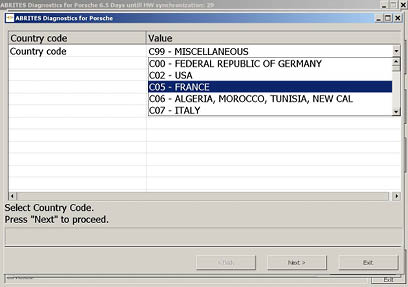
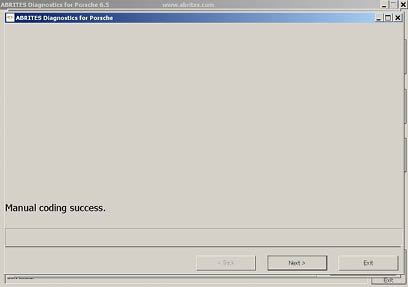
After you select “Manual coding” and press “Next” the program will give you the options to select vehicle
configuration, calculate unit’s default coding (have in mind that you will need internet connection for that) and if everything is OK, guide you to the page where you can select to execute the coding or not by
pressing “Next” or “Exit” (“Next” will do the coding).
ATTENTION! Use “Manual coding” carefully. You have to be sure that you choose the correct vehicle configuration options otherwise the calculated coding might not be correct and brake the unit.
1.
3.
2.
4.


20
www.abrites.com
www.abrites.com

Abrites Diagnostics for Porsche User Manual
21
21
5.
7.
6.
8.
9.
www.abrites.com
Abrites Diagnostics for Porsche User Manual
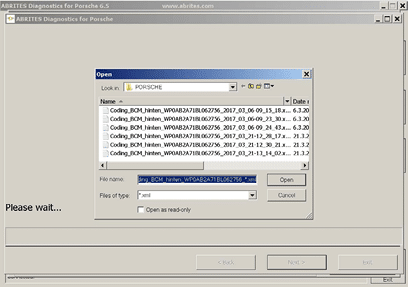
3.3.3.4 Coding – Automatic coding from file
After “Automatic coding” or “Manual coding” has been performed, each time the coding information before the coding is done is saved into a file into the log files directory so in case of wrong coding result the previous coding could be turned back into the unit by using this function.
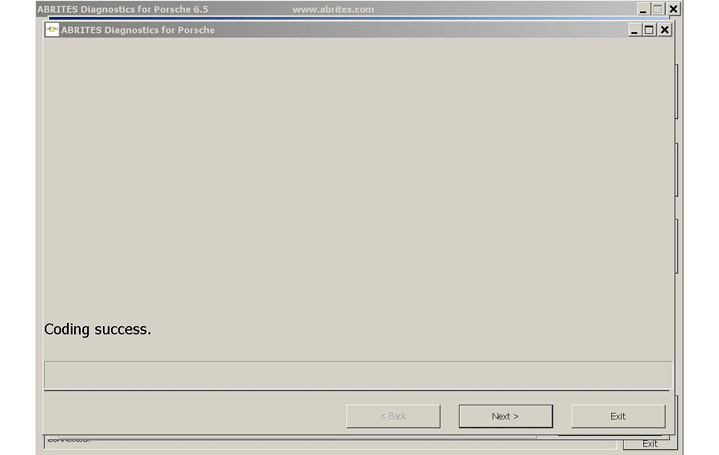
After you select “Automatic coding from file” and press “Next” the program will read vehicle configuration, download unit’s coding information (have in mind that you will need internet connection for that) and if everything is OK, guide you to the page where you can select the file which should be used for coding (file’s name contain VIN number, unit name, date and time of creation). Pressing “Next” will show the page where you can select to execute the coding or not by pressing “Next” or “Exit” (“Next” will do the coding).


22
www.abrites.com
Abrites Diagnostics for Porsche User Manual
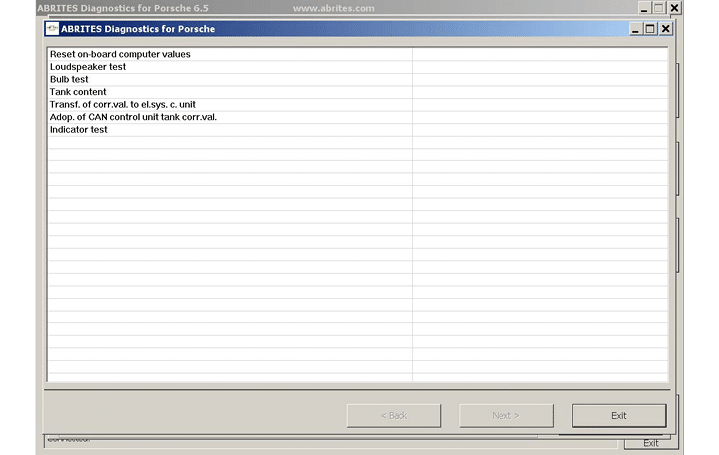
Actuator tests
This function will provide you the opportunity to perform some test of certain unit’s functionality.
When button “Actuator tests” is pressed a new dialog appears where are listed the categories of tests which can be performed.
Here is an example with “Instrument Cluster” of Porsche Boxster (987):
23
www.abrites.com
Abrites Diagnostics for Porsche User Manual
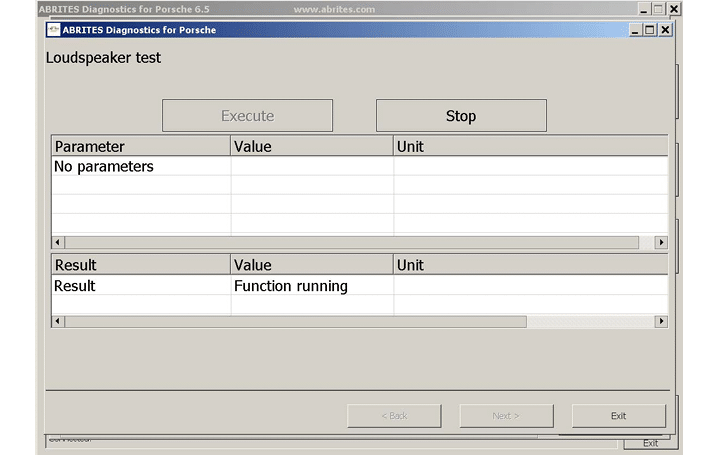

After “Loudspeaker test” is selected and “Next” button is pressed the following window appears:
Press “Stop” to stop the test.
Press “Execute” to start the test.
24
www.abrites.com
Abrites Diagnostics for Porsche User Manual
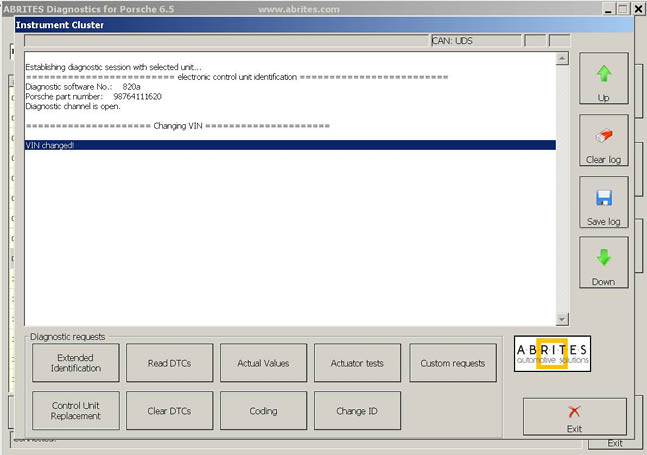
3.3.5 Change ID
This function allows you to change the Vehicle Identification Number value of the selected unit.
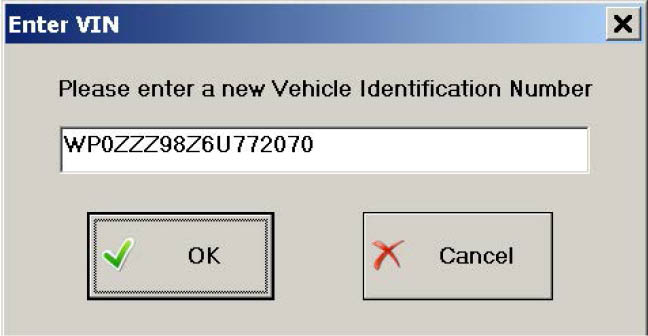
When you press button “Change ID” the following window appears:
In the field is displayed VIN number read from Gateway unit (if connected to vehicle, otherwise the field will remain empty).
You can set there any VIN number you like.
Press “OK” to change VIN number of the selected unit.
Press “Cancel” to leave it unchanged.
If “OK” is pressed the result will be displayed in the main window:
25
www.abrites.com
Abrites Diagnostics for Porsche User Manual
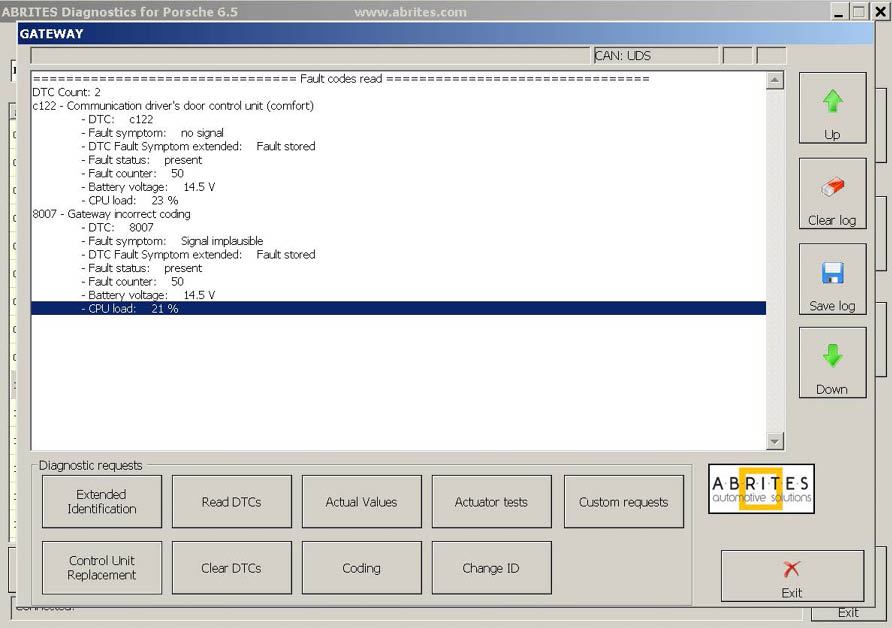
3.3.6 Read Diagnostic Trouble Codes
“Read DTCs” read the diagnostic trouble codes currently stored into the device
The total number of DTCs being set is also reported.
26
www.abrites.com
Abrites Diagnostics for Porsche User Manual
3.3.7 Clear Diagnostic Trouble Codes
“Clear DTCs” button will clear all stored DTCs inside of the unit.
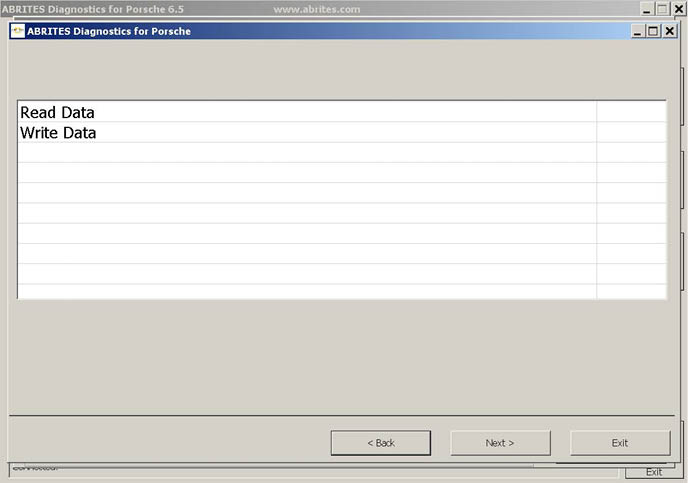
3.3.8 Control Unit Replacement
This function allows you to read unit’s configuration data and then write it into another unit so that the new unit can be easily installed into the vehicle.
When button “Control Unit Replacement” is pressed the following window appears:
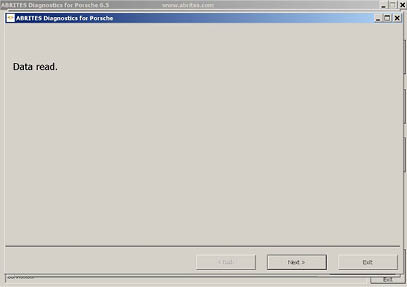
When you choose “Read data” and press “Next” the software will read the configuration data of the unit to
which diagnostic session is established currently and save it to file into the log files directory.

27
www.abrites.com
Abrites Diagnostics for Porsche User Manual

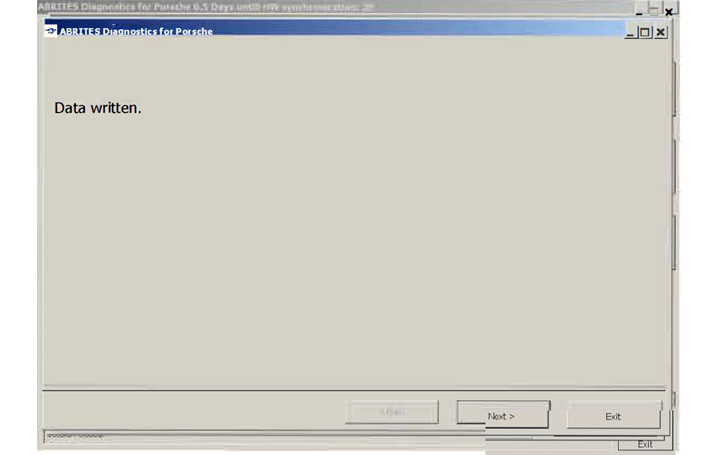
When you choose “Write data” and press “Next” the software will read the configuration data from the saved file into the log files directory and writes it to the unit to which diagnostic session is established.
28
www.abrites.com
Abrites Diagnostics for Porsche User Manual
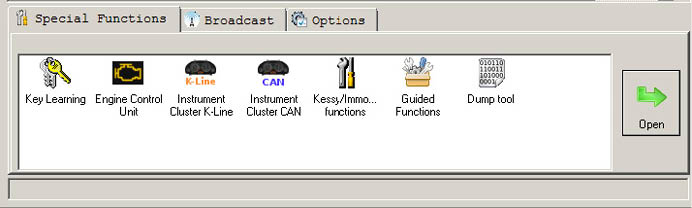
3.4 Special Functions
Special functions are some specific for electronic control units application, which will allow you to learn keys, read security access codes, read/program unit’s configuration data / flash content and so on.
Special functions are available from the main dialog of the application.
The appropriate special function is opened by selecting it in the list box and double-clicking on it, or by pressing the “Open” button.
3.4.1 Special functions with “Instrument Cluster CAN”
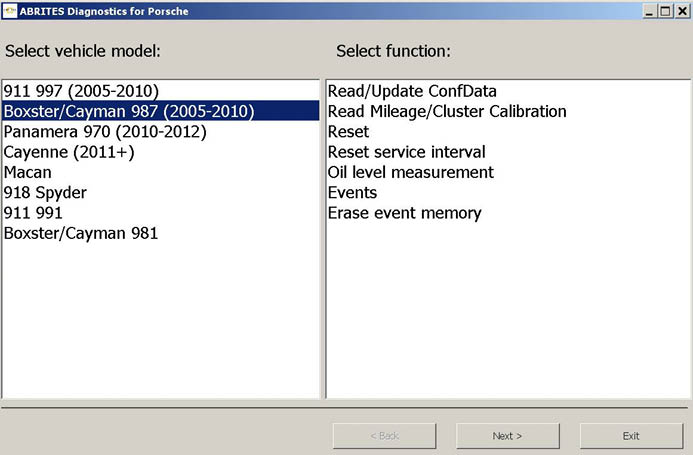
When this function is opened, the following dialog appears:
The user can select vehicle model from the “Select vehicle model” list.
The user can select certain function available for the selected vehicle model from the “Select function” list.
29
www.abrites.com
Abrites Diagnostics for Porsche User Manual
The following vehicle models can be selected for special function “Instrument cluster CAN”:
911 997 (2005-2010)
Boxster 987 (2005-2010)
Panamera (2010-2012)
Cayenne (2011+)
Macan
918 Spyder
911 991
Boxster/Cayman 981
3.4.1.1. 911 997, Boxster 987 and Cayman
For vehicle models 911 997, Boxster 987 and Cayman the available functions are:
Read/Write ConfData
Read mileage value
Reset cluster
Reset service interval
Oil level measurement
Events
Erase event memory
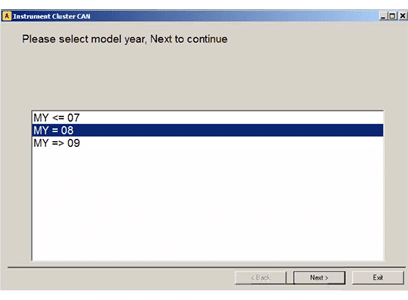
3.4.1.1.1 “Reset service interval”
When “Reset service interval” is selected, by pressing button “Next” the “Abrites Diagnostics for Porsche” connects to the instrument cluster and guides the user to select some specifics of the vehicle model after which resets the service interval.

30
www.abrites.com
www.abrites.com

Abrites Diagnostics for Porsche User Manual
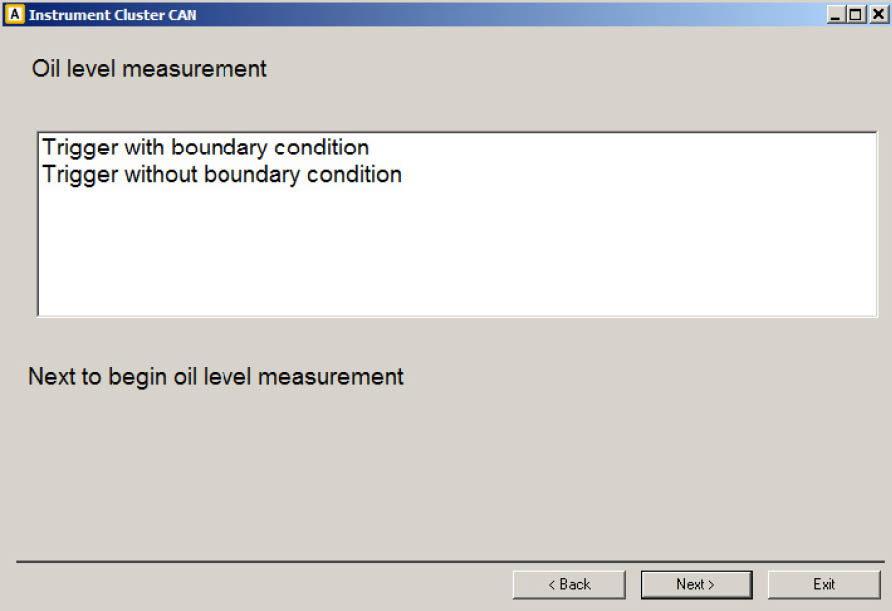
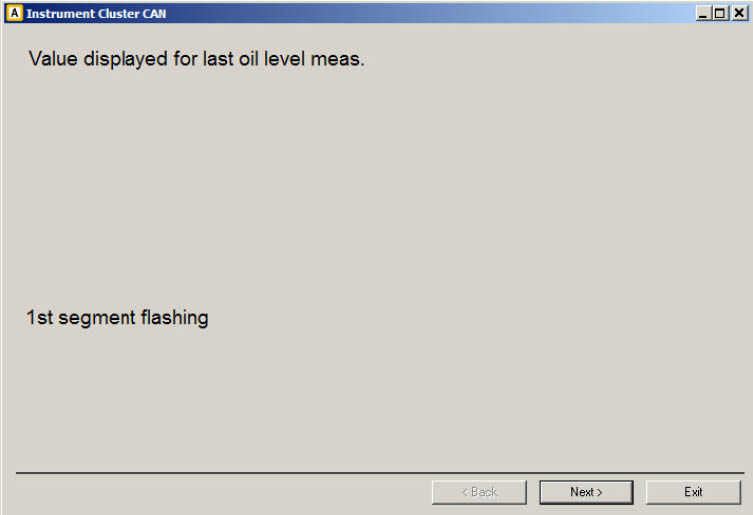
3.4.1.1.2 “Oil level measurement”
When function “Oil level measurement” is selected, by pressing button “Open” the “Abrites Diagnostics for Porsche” connects to the instrument cluster and after some specifics are clarified gives information about the oil level.
31
31
www.abrites.com
Abrites Diagnostics for Porsche User Manual
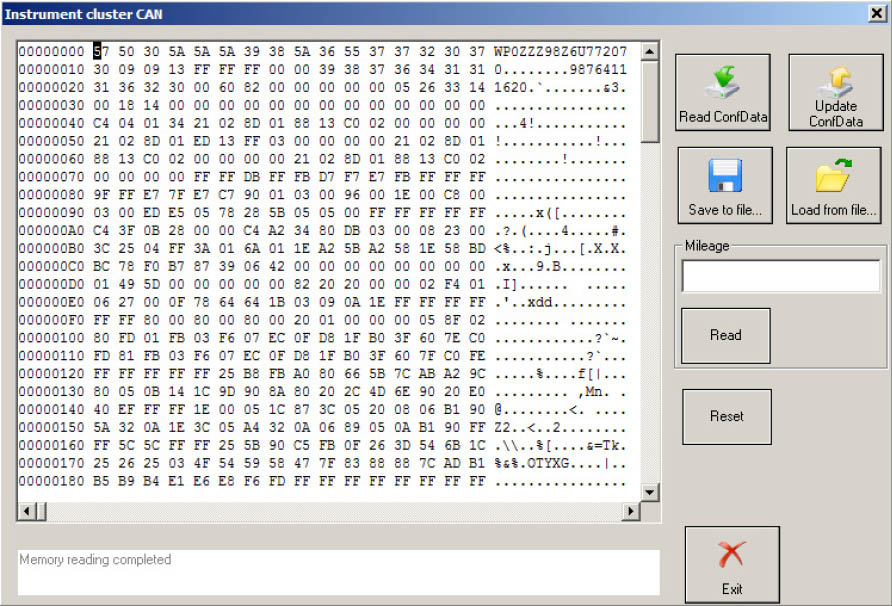
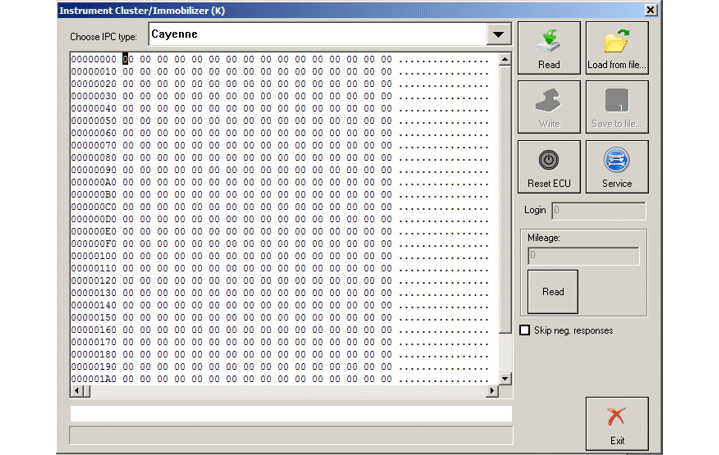
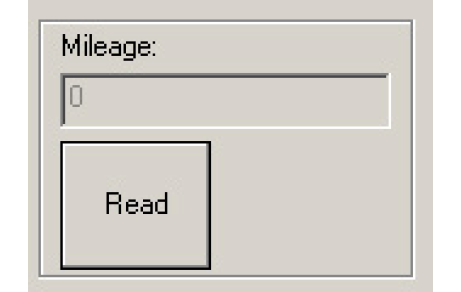
3.4.1.1.3 “Read/Write ConfData, Read mileage value, Reset cluster “
If functions “Read/Write ConfData, Read mileage value, Reset cluster “ is selected when pressing button “Open”, the “Abrites Diagnostics for Porsche” opens diagnostic session to the instrument cluster and the following dialog appears:
32
www.abrites.com
Abrites Diagnostics for Porsche User Manual
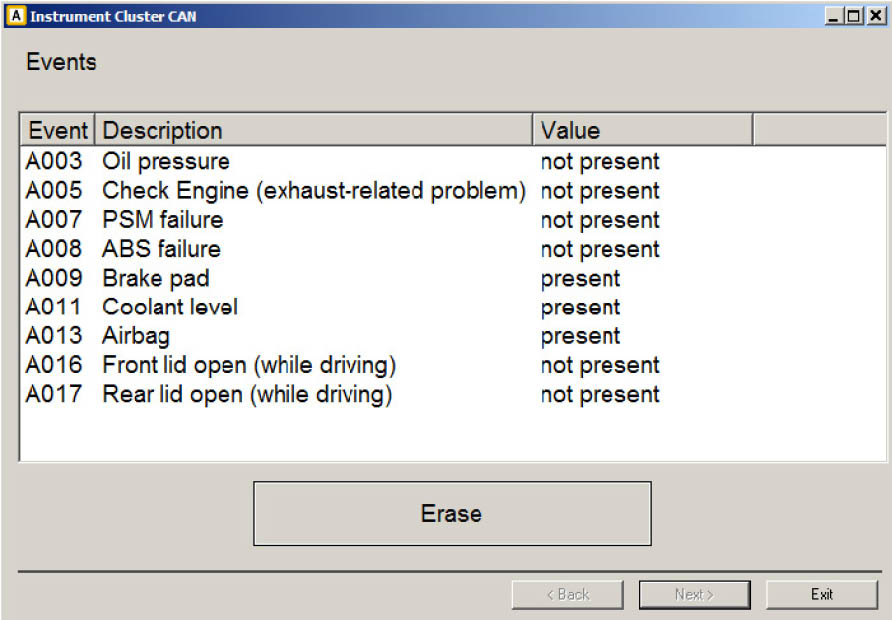
3.4.1.1.4 “Events” , “Erase event memory”
If functions “Events” or “Erase event memory” is selected when pressing button “Open”, the “Abrites Diagnostics for Porsche” opens diagnostic session to the instrument cluster and the reads the event memory and display it. If “Erase event memory” is selected also a button “Erase” is available.
The following dialog appears:
Use button “Erase” to erase the event memory.
33
www.abrites.com
Abrites Diagnostics for Porsche User Manual
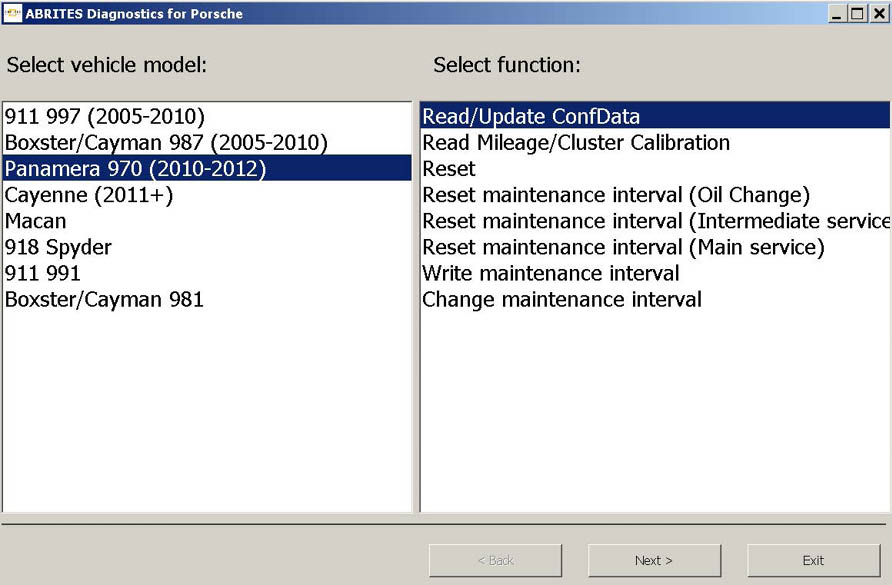
3.4.1.2 Panamera (2010-2012) and Cayenne (2011+)
For vehicle model Panamera (2010-2012) and Cayenne (2011+) the available functions are:
For vehicle model Macan,918 Spyder, 911 991, Boxster/Cayman 918 the available functions are:
The wizard will guide you through the steps related to these functions.
34
www.abrites.com
Abrites Diagnostics for Porsche User Manual
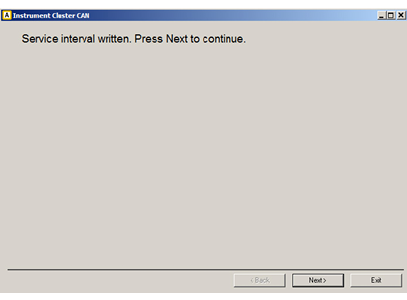
3.4.1.2.1 “Reset service interval”
If “Reset service interval (Oil Change)”, “Reset service interval (Interim Service)” or “Reset service interval (Main and Interim Service)” is selected:
By pressing “Next” service interval is reset.
35
www.abrites.com
Abrites Diagnostics for Porsche User Manual
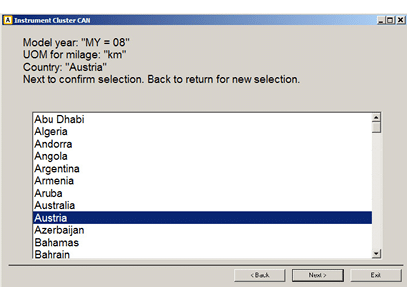
3.4.1.2.2 “Write maintenance interval”
If “Write maintenance interval” is selected:
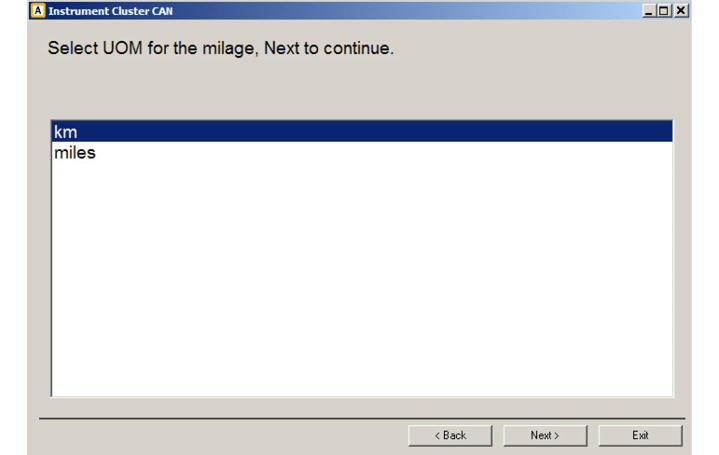
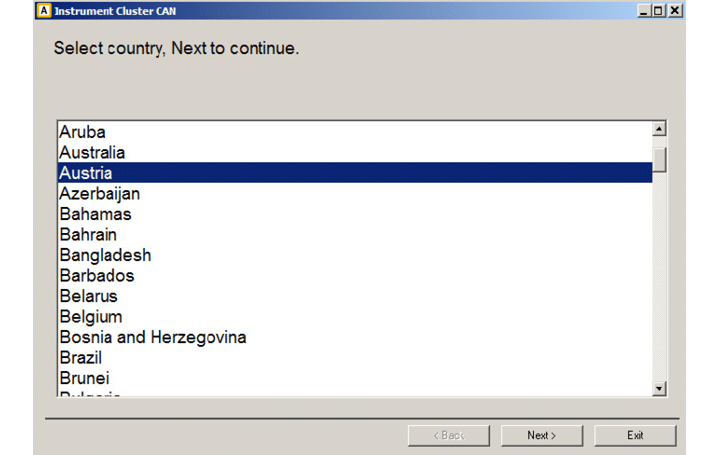
First window requires the user to select the country where vehicle is maintained.
Next window requires the user to select the unit of measurement (UOM) for the mileage value.
36
www.abrites.com
Abrites Diagnostics for Porsche User Manual

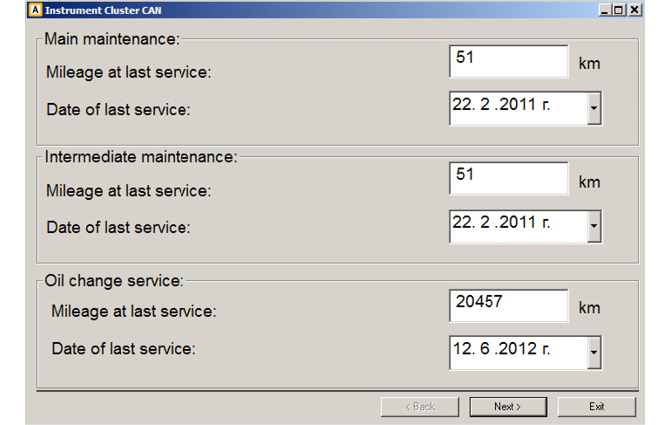
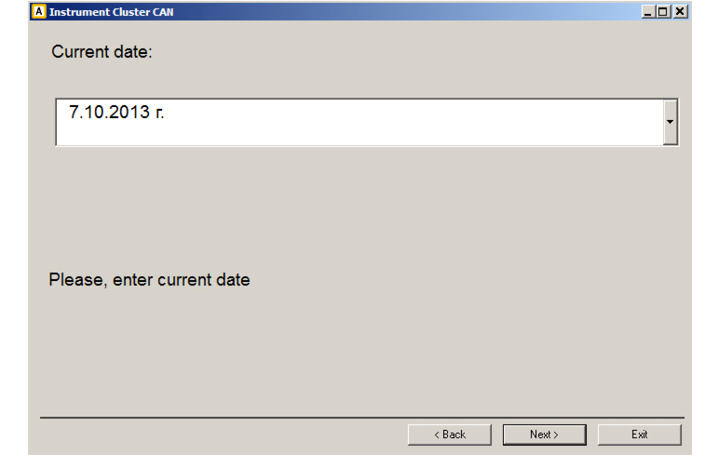
Next window displays the current values of “mileage” and “date” of last “main”, “intermediate” and “oil change” service performed.
User can modify these values as desired.
Next window require the user to select the type of service for which the “Abrites diagnostics for Porsche” to write new mileage and date values into instrument cluster.
By pressing “Next” selected maintenance interval values are written into instrument cluster.
37
www.abrites.com
Abrites Diagnostics for Porsche User Manual
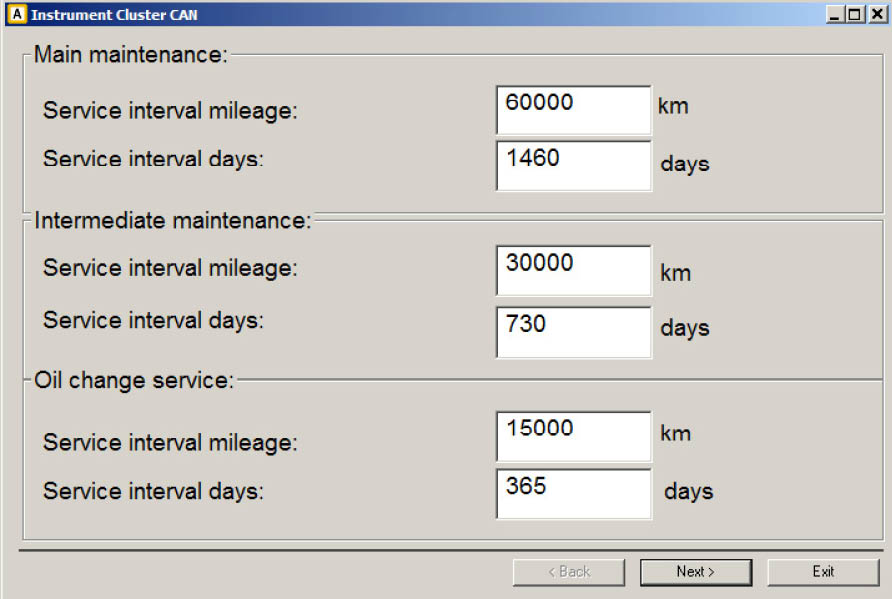
3.4.1.2.3 “Change maintenance interval”
If “Change maintenance interval” is selected:
First window displays the current set values of mileage and days between “main”, “intermediate” and “oil change” service performed.
38
User can modify these values as desired.
www.abrites.com
Abrites Diagnostics for Porsche User Manual

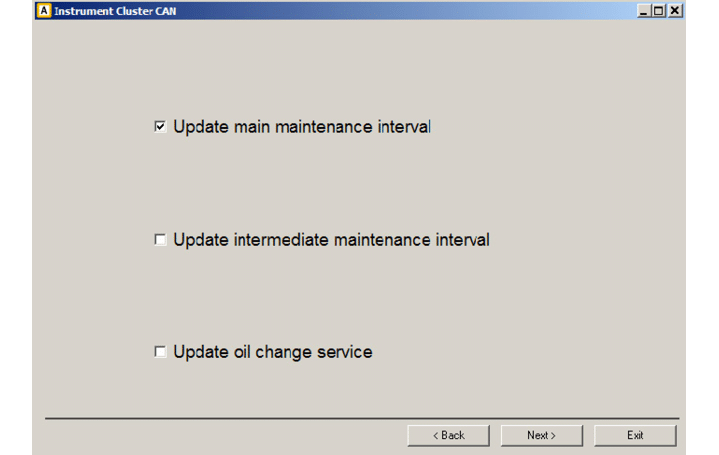
Next window require the user to select the type of service for which the “Abrites diagnostics for Porsche” to write new mileage and date values into instrument cluster.

39
www.abrites.com
Abrites Diagnostics for Porsche User Manual
3.4.2 Special functions with “Instrument Cluster K-Line”
When this function is opened, the following dialog appears:
The user is able to select through the following vehicle models:
Cayenne
911 (996), GT2 (996), GT3(996), Boxter(986) - 1998-07/2001 [C56]
911 (996), GT2 (996), GT3(996), Boxter(986) - 08/2001-2005 [C86]
If vehicle model “Cayenne” is selected the following functions are available:
40
www.abrites.com
Abrites Diagnostics for Porsche User Manual
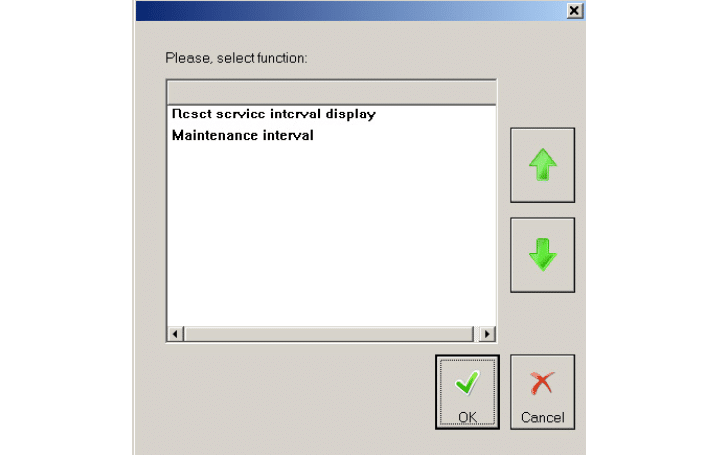
If function “Reset service interval display” is selected the Diagnostics connects to the instrument cluster and resets the service interval display.
If function “Maintenance interval” is selected the Diagnostics connects to the instrument cluster and after some details are specified (engine type, production year, mileage unit, country) the maintenance interval is reset.
41
www.abrites.com
Abrites Diagnostics for Porsche User Manual
If vehicle model “911 (996), GT2 (996), GT3(996), Boxter(986) - 1998-07/2001 [C56]” is selected the following functions are available:
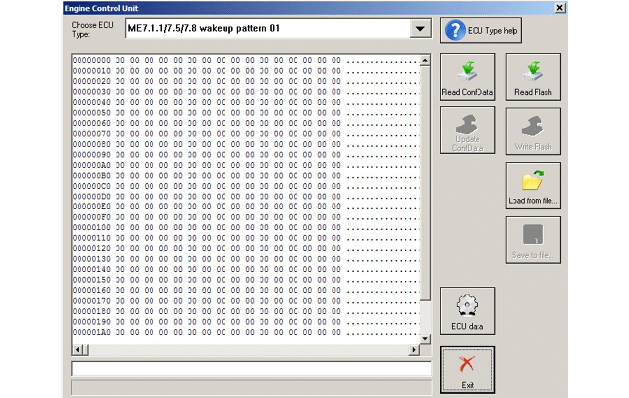
3.4.3 Special functions with “Engine Control Unit”
When “Engine control unit” is opened the following dialog appears:
Special functions with ECU can be:
You need to clarify the type of Engine Control Unit in the car before proceeding!
You can choose ECU type – ME7.x (wakeup id 0x01), MED9.1, ME7.x(wakeup id 0x11), ME7.2, ME5.2, ME7.8 (9x6), ME7.8 (9x7)
42
www.abrites.com
Abrites Diagnostics for Porsche User Manual
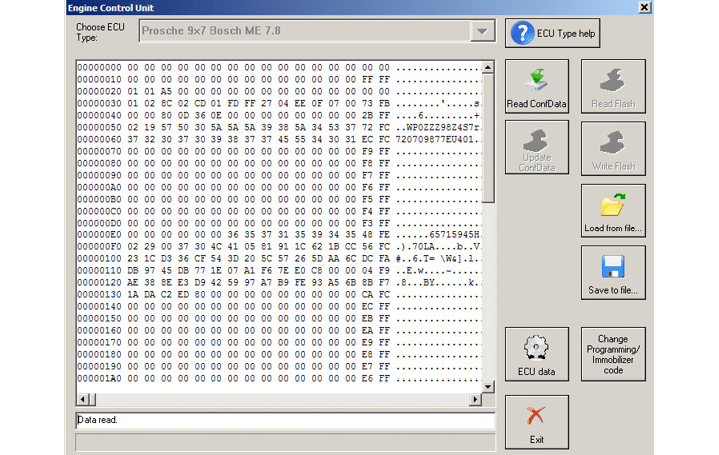
Example is : Read ConfData of “Bosch ME7.8”:
43
After ECU type is chosen the following functions are available:
3.4.3.1 Read ConfData
By pressing button “Read ConfData”, the Diagnostics connects to the engine control unit and reads engine control unit’s configuration data. The read data is put into the hexadecimal display and can be saved to a file by pressing button “Save to file...”.
Before reading is started the Diagnostics will ask you to select whether to auto-detect engine control unit’s configuration data start address and length or you can specify certain memory area to be read.
3.4.3.2 Write ConfData
The loaded into the hexadecimal display data is written to the ECU.
Before writing is started the Diagnostics will ask you to select whether to auto-detect engine control unit’s configuration data start address and length or you can specify certain memory area to be written.
3.4.3.3 Read flash
By pressing button “Read flash”, the Diagnostics connects to the engine control unit and reads flash data. The read data is put into the hexadecimal display and can be saved to a file by pressing button “Save to file...”.
www.abrites.com
Abrites Diagnostics for Porsche User Manual

3.4.3.4 Write flash
The loaded into the hexadecimal display data (if flash was read and modified or flash data is loaded by pressing button “Load from file...”) is written to the ECU.
Press button “Load from file...” to load a binary file’s data into the hexadecimal display.
Press button “Save to file...” to save the content of the hexadecimal display to binary file.
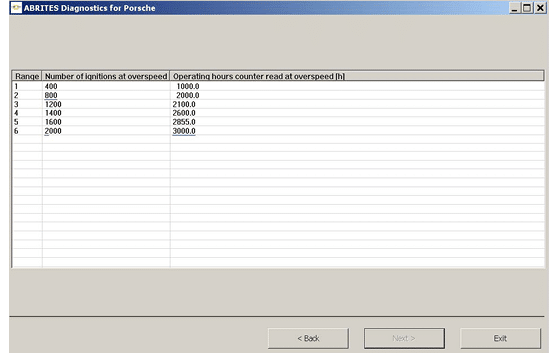
Read ECU data
By pressing button “ECU data” the “Abrites Diagnostics for Porsche” connects to the ECU and reads some
specific ECU’s characteristics like “VIN”, “Operating hours counter”, “Total distance”, etc.
The following window appears:
To read overspeed events information select “Overspeed events” row and press “Next”
To change certain range, enter new values, select row and press “Next”.
44
www.abrites.com
Abrites Diagnostics for Porsche User Manual
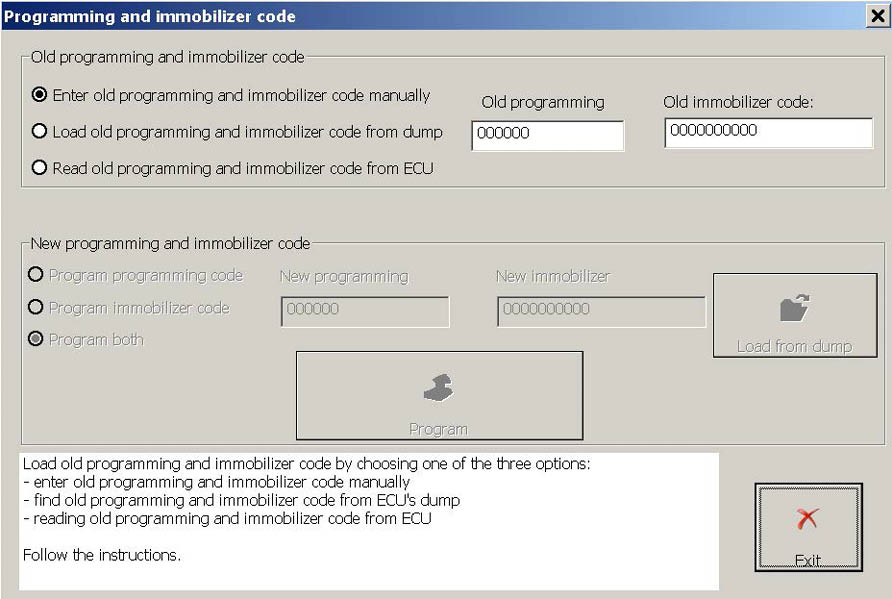
3.4.3.6 Change Immobilizer code in ECU
Attention! When modifying a value please make sure you keep it’s format the same as read i.e. do not delete measurement units (if any), do not delete spaces and so on.
HINTS when reading/writing flash memories of ECUs:
If you experience problems with reading ME7.x memory better remove fuse 11 and fuse 15 to prevent disturbing of communication from the instrument cluster and try again.
When flashing the device please always read and save first the original flash!
Please, stop all screen savers/power saving options and unused application during the flashing! Please do not do anything else on your PC while flashing.
Please, take into account that the reading/writing of the flash will take a long time (especially when CAN connection is used) – as result the battery may become flat.
HINTS when reading/writing ConfData memory of ECUs:
If you experience problems with reading ME7.x ConfData better remove fuse 11 and fuse 15 to prevent disturbing of communication from the instrument cluster and try again.
45
www.abrites.com
Abrites Diagnostics for Porsche User Manual

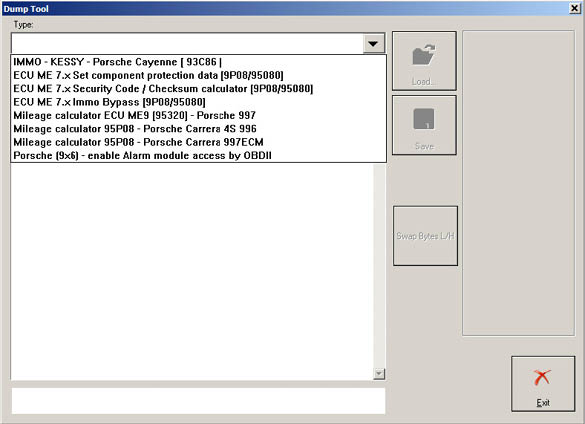
3.4.4. Special function “Dump Tool”
Using this application you can calculate security access codes, calculate mileage and so on.
This application needs the configuration data dump from the corresponding unit.
After the dump is loaded some modification will be made and you need to store the dump as a new file, which you can program into the device.
46
www.abrites.com
Abrites Diagnostics for Porsche User Manual
3.4.4. Special function “Dump Tool”
Using this application you can calculate security access codes, calculate mileage and so on.
This application needs the configuration data dump from the corresponding unit.
After the dump is loaded some modification will be made and you need to store the dump as a new file, which you can program into the device.
3.4.5.Special function “Key learning”
After a procedure is selected, press button “Open” for to open the function.
47
www.abrites.com
Abrites Diagnostics for Porsche User Manual

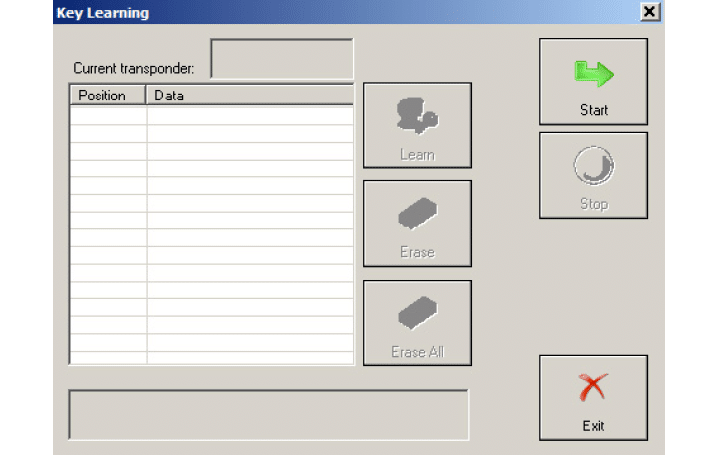
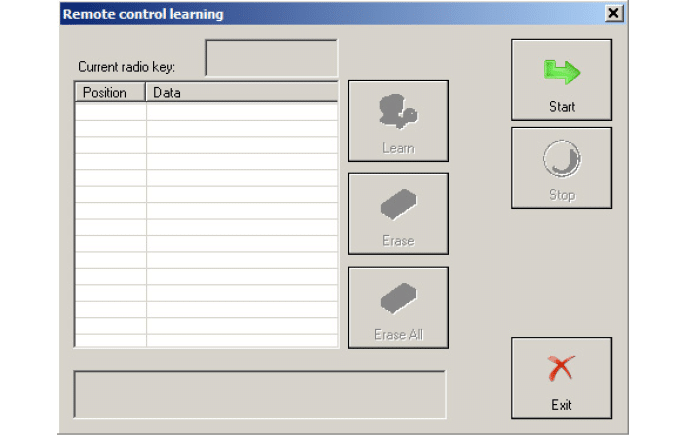
3.4.5.1 Teach keys - GT2 996, GT3 996, 911 996, Boxster 986, Carrera GT
When “Next” is pressed the following window appears:
When button “Start” is pressed the “Abrites Diagnostics for Porsche” connects to the “Alarm” module and reads the keys which are currently accepted from the car. There can be up to four keys learned at positions correspondingly 1,2,3 and 4.
48
www.abrites.com
Abrites Diagnostics for Porsche User Manual
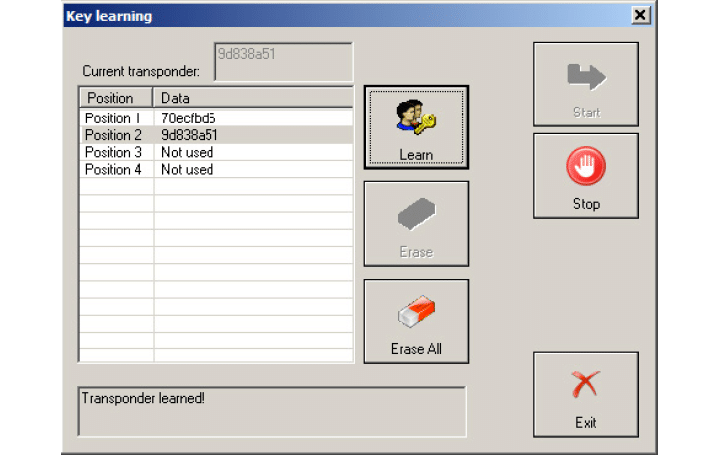
During reading the Diagnostics will ask you to specify the 3 bytes “Key learning code” of the alarm module. You will have the opportunity either to write down the code if it is available for you or to extract it by loading the alarm’s configuration data dump.
If you want to learn the key currently in the ignition lock, then you need to select a certain position (1 to 4) at which you like the key to be written. This is done by clicking over the corresponding position. By pressing button “Learn” the Diagnostics writes key’s ID at the corresponding position into the alarm module. Key is learned.
For to erase all the learned keys, press button “Erase all”.
For to disconnect from the alarm module press button “Stop”.
49

www.abrites.com
Abrites Diagnostics for Porsche User Manual
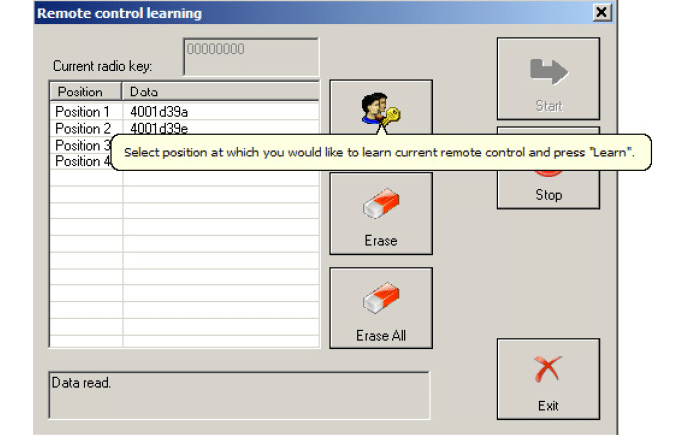
3.4.5.2 Teach remote control - GT2 996, GT3 996, 911 996, Boxster 986, Carrera GT
By selecting “Teach remote control - GT2 996, GT3 996, 911 996, Boxster 986, Carrera GT” the user can learn remote control for vehicle models GT2 996, GT3 996, 911 996, Boxster 986 and Carrera GT. When “Open” is pressed the following window appears:
When button “Start” is pressed the “Abrites Diagnostics for Porsche” connects to the “Alarm” module and reads the remote controls which are currently accepted from the car. There can be up to four remote controls learned at positions correspondingly 1,2,3 and 4.
50
www.abrites.com
Abrites Diagnostics for Porsche User Manual

During reading the Diagnostics will ask you to specify the 3 bytes “Key learning code” of the alarm module. You will have the opportunity either to write down the code if it is available for you or to extract it by loading the alarm’s configuration data dump.
If you want to learn the remote control currently in the ignition lock, then you need to select a certain position (1 to 4) at which you like the remote control to be written. This is done by clicking over the corresponding position. By pressing button “Learn” the Diagnostics writes the remote control’s ID at the corresponding position into the alarm module. During writing the Diagnostics will ask you to specify the 12 bytes transmitter code of the remote (you can find it written over it).
Remote control is learned.
For to erase a remote control at certain position, first select the position by clicking over it and then press button “Erase”.
For to erase all the learned remote controls, press button “Erase all”.
For to disconnect from the alarm module press button “Stop”.

51
www.abrites.com
Abrites Diagnostics for Porsche User Manual
3.4.5.3 Teach keys – Cayenne (-2010)
By selecting function “Teach keys” for vehicle model Cayenne (-2010) the user can learn transponder key for vehicle model Porsche Cayenne.
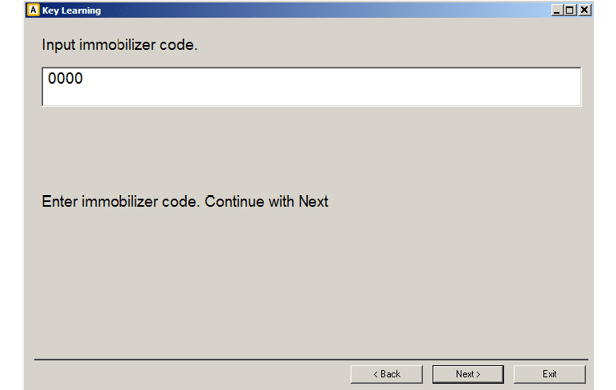
When “Next” is pressed the following window appears requiring from user to input the 4 digit immobilizer (Login) code.
The immobilizer (Login) code can be read from ECU by OBDII (for Bosch Gasoline EUCs) or from configuration data dump of the Kessy module using special function “Dump tool”.
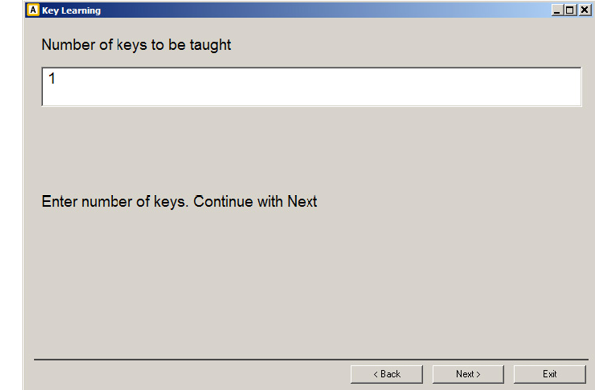
Next screen requires the key count that will be taught (a number 1 to 4).
By pressing “Next” key learning procedure begins.
52
www.abrites.com
Abrites Diagnostics for Porsche User Manual
3.4.5.4 Program dealer key – Cayenne (-2010)
For vehicles with HITAG2 key/transponder year model 2004-2007 you must use virgin transponder PCF7936 or virgin key.
If you use a Transponder - you need to switch it in Cipher (“Crypto”) mode.
You can use your Key programmer HiTag2 programmer for that purpose if you have one. This is done by replacing 0x06 with 0x0E in the first byte of the configuration page (Configuration page is page 3 where page 0 is the transponder ID, and pages 1 and 2 are the secret key).
If this value is already 0x0E then the transponder is already in cipher mode.
For vehicles with HITAG2 key/transponder year model 2007+ you need to prepare the HITAG2 key/transponder for to use it.
This can be done using function “Program dealer key”.
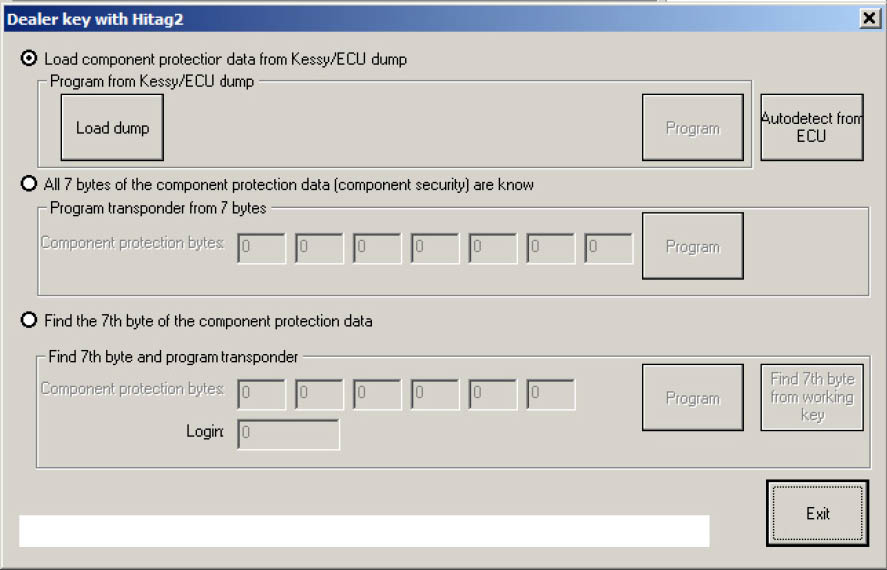
After this function is selected and “Next” button is pressed the following window appears:
53
www.abrites.com
Abrites Diagnostics for Porsche User Manual
54
There are following possibilities:
The “Autodetect from ECU” button will try automatically to read the component security bytes from the ECU, and will select for you automatically whether you need to search for the 7th byte or not.
IMPORTANT: If you don’t have a working key from the car, you will need to short the fuses as described in the appendix to get communication with the ECU.
After the component security is read, if you’ve all 7 bytes, then you can program the key directly. If you have only the 6 bytes, you have to choose:
a) if you have working key from this car, you can put it into the programmer, and press the “Find 7th byte from working key” - the 7th byte will be found in several seconds;
NOTE: If you use the Tango programmer this function will not work, the function work only on Hitag2 or Abrites key programmer.
b) if you don’t have a working key, you’ve to search manually for the 7th byte. The procedure takes approximately about 20-25 min, but can rise to 45min in the worst case. You’ve to connect the interface to the OBDII, and the programmer should be connected too. Then after pressing the “Program” button you will receive notification when to put the key into the ignition, and when to put it into the programmer.
IMPORTANT: You need only to put the key inside , please DO NOT ROTATE THE KEY.
IMPORTANT: You may hold the programmer near the ignition lock so you can proceed faster when you remove the key. But please pay attention that the programmer is at least 15cm from the ignition lock so the reading of the key from the car is not disturbed.
NOTE: It is always better to use a plastic key or an empty transponder when you search for the 7th byte, at least when you prepare such keys for the first time. If by some reason the key becomes locked (e.g. battery goes down, computer is hang-up, etc.), you can find the encryption-key with the “Find 7th byte from working key” button, and then you can restore the key with the Hitag2 key tool.
www.abrites.com
Abrites Diagnostics for Porsche User Manual
You can load a dump of the Kessy or ECU using the “Load component protection from Kessy/ECU dump” radio-button. After pressing the “Load dump”button you’ve to select the respective dump file, after that the “Program” button will be active.
NOTE: Please pay attention that in the ECU dump sometimes there are only 6 of the component security bytes. In this case you will need to search for the 7th byte.
NOTE: Please pay attention that if you have the Kessy dump, then you will have all the 7 bytes. But there are a lot of Kessy devices with different software versions, so it is possible that the configuration data is incorrect decrypted, respectively the component security bytes will be wrong. In this case the key will not work and you will need to restore the key using the Hitag2 programmer.
It is possible that by some reason the Autodetect button is not functioning, e.g. missing license, you don’t make the short with the fuses properly, ECU is missing or is broken, and so on.
If you’ve already read the component security bytes previously (e.g. by dissoldering the ECU EEPROM and decoding it by dump tool), then you can put the component security bytes manually and proceed as described in step 2.1
After you have a key/transponder ready for learning you have to specify how many keys you would like to learn and the security access code of the kessy module into the “Key learning Porsche Cayenne” window. Press button “Learn” for to start the learning procedure.

55
www.abrites.com
Abrites Diagnostics for Porsche User Manual
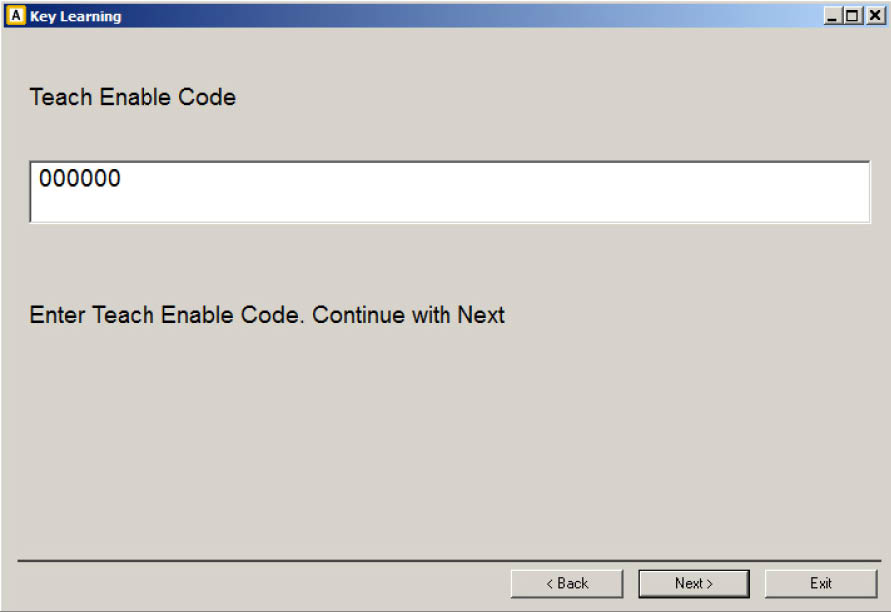
3.4.5.5 Teach keys - 911 997, Boxster 987, Cayman
Function “Teach keys” function for vehicle models “911 997 (2005-2010)”, “Boxster 987 (2005-2010)”,“Cayman (2005-2010)” offers the opportunity to learn one to six keys to the vehicle.
First window requires the user to input the three bytes teach enable code of the PAS module:
56
www.abrites.com
Abrites Diagnostics for Porsche User Manual
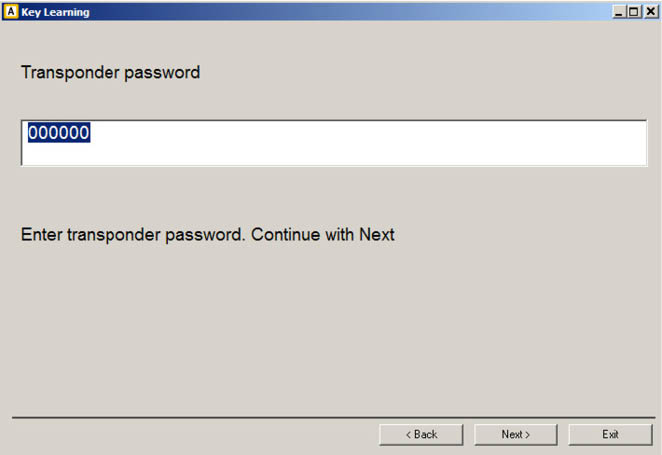
Next window requires the user to input the 6 digit (3 bytes) transponder password:

Next window requires the user to input the key count (a number 1 to 6) that will be taught:
57
www.abrites.com
Abrites Diagnostics for Porsche User Manual
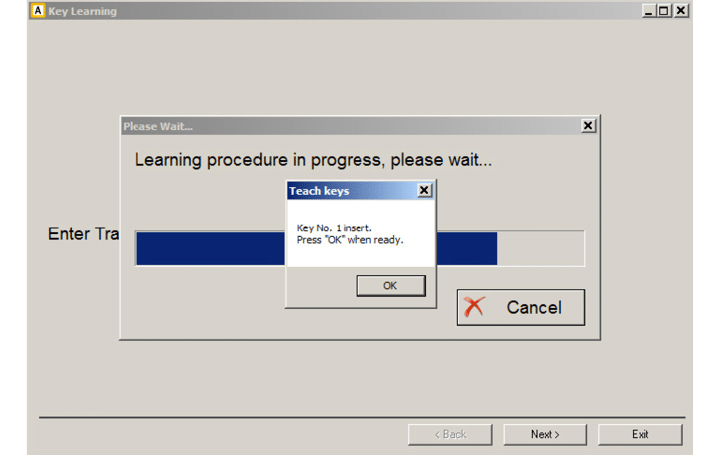
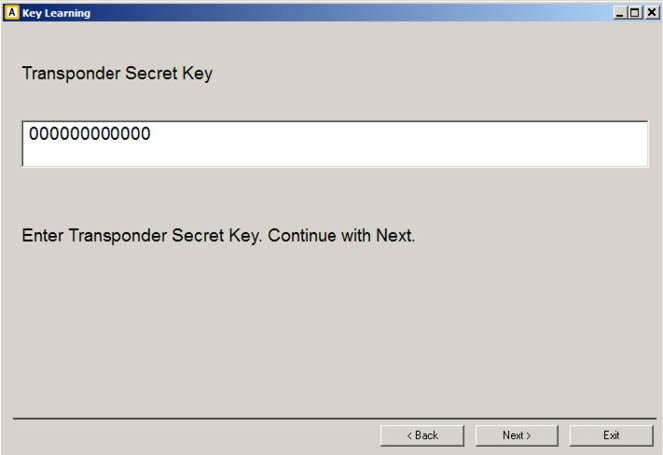
Next window requires the user to input the 12 digit (6 bytes) transponder secret key:
By pressing “Next” button the procedure is started.
58
www.abrites.com
Abrites Diagnostics for Porsche User Manual
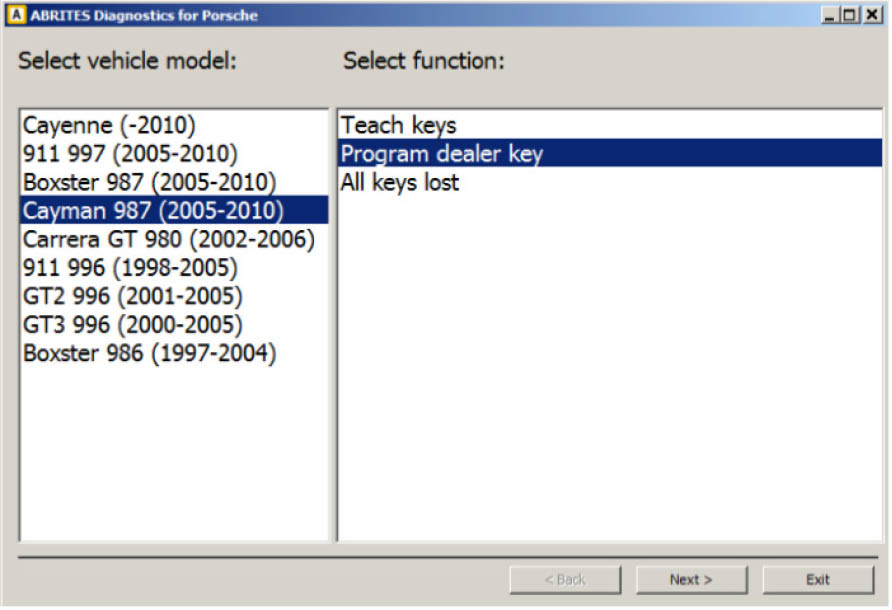
3.4.5.6 Program dealer key on 911 997, Boxster/Cayman 987
If you don’t have key ordered from a dealer for vehicle “911 997, Boxster/Cayman 987“ you can prepare a virgin HITAG2 key/transponder.
Connect your Abrites programmer to the PC.
Open the “Key learning” special function. Select vehicle model “911 997” or “Boxster 987”or “Cayman 987“.
Select the function “Program dealer key” and Press “Next”.
59
www.abrites.com
Abrites Diagnostics for Porsche User Manual

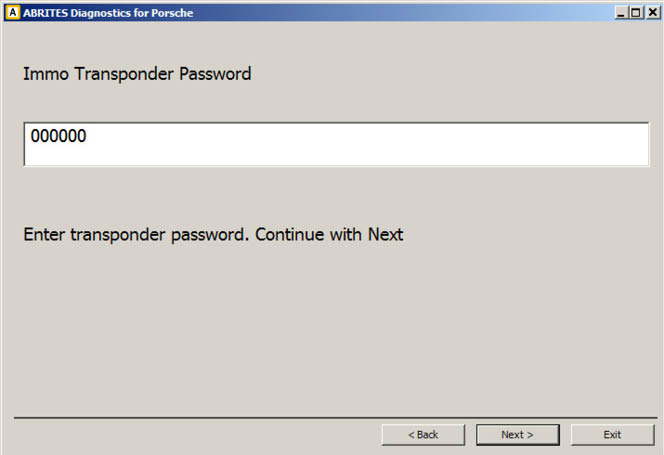
Next window requires to input the 6 digit (3 bytes) transponder password:
Next window requires the user to input the 12 digit (6 bytes) transponder secret key:
Put new HITAG key/transponder into Tag programmer.
By pressing “Next” button key/transponder will be written and ready to be learned.
60
www.abrites.com
Abrites Diagnostics for Porsche User Manual

3.4.5.7 “All keys lost” function for 911 997, Boxster/Cayman 987
You can learn keys to vehicle model 991 997, Boxster/Cayman 987 with no need to provide as input “teach enable code”, “transponder password”, “transponder secret key” using function “All keys lost”.
Please pay attention that after you execute this function all old/existing keys will no longer work.
For to use this function you need Tag programmer and ABPROG.
During the procedure you have to first disconnect from vehicle PAS module and ESL modules, desolder PAS module 24c08 ConfigData chip and ESL module 24c04 ConfigData chip, then solder them back and connect both modules to vehicle (see Appendix 5.2 Removing ESL Porsche 911 997, Boxster/Cayman 987).
61
www.abrites.com
Abrites Diagnostics for Porsche User Manual
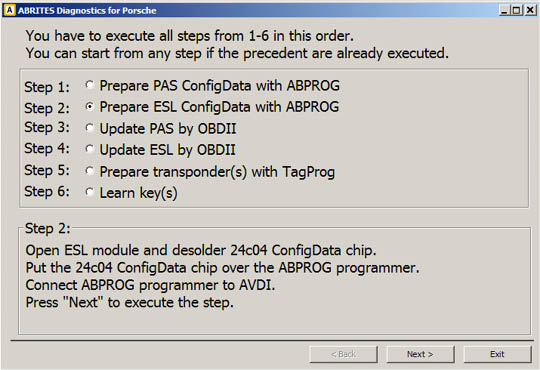
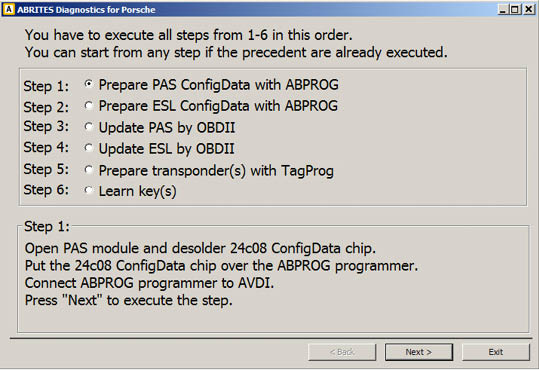
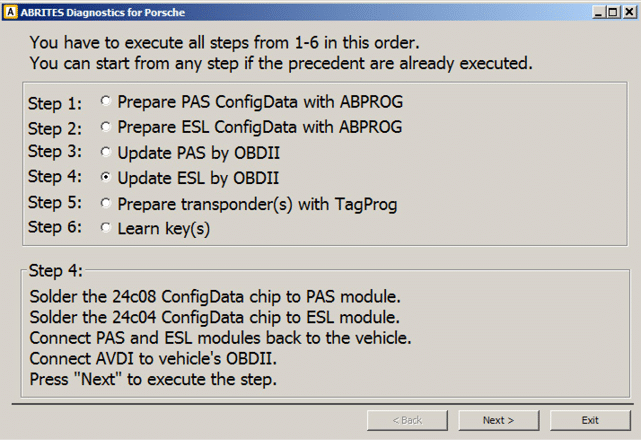
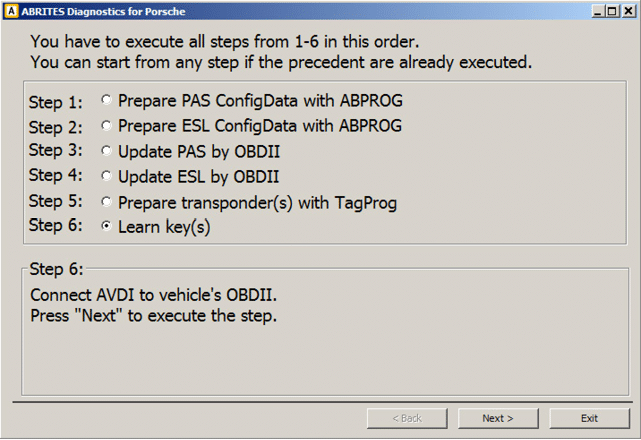
The procedure consists of six steps. These steps have to be executed in the given order (1 to 6).
You can start from any step if the precedent are already executed (i.e. when you open the function in the Porsche commander you don’t have to start from scratch if you have already successfully performed some of the steps before).
Step 1:
62
Step 2:
www.abrites.com
Abrites Diagnostics for Porsche User Manual
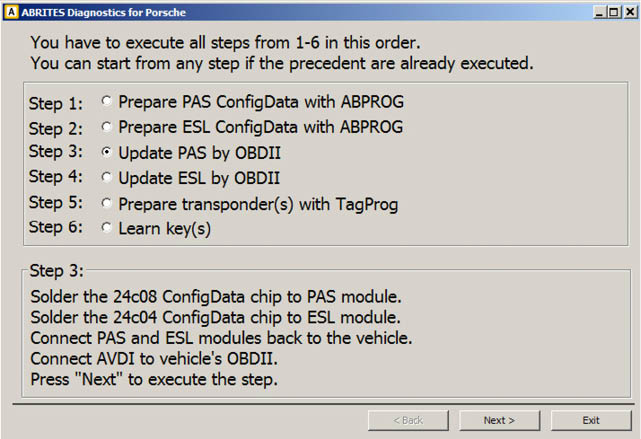
Step 3:
63
Step 4:
www.abrites.com
Abrites Diagnostics for Porsche User Manual

Step 5:
64
Step 6:
www.abrites.com
www.abrites.com

Abrites Diagnostics for Porsche User Manual

65
65
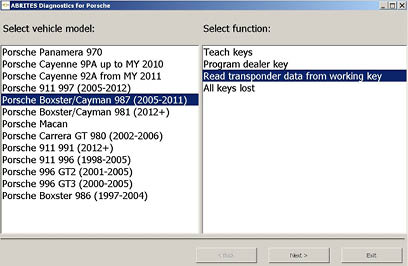
3.4.5.8 Read Transponder/Immo data from a working key for 911 997, Boxster/Cayman 987 when adding a spare key
When you have a working key to the Porsche, you now can use the TA26 Extractor to read the data from the working key and add a spare one. You need to make sure to have a ProTag connected to the PC, internet connection and no more than 3 minutes time.
To do this, open the “Key Learning” special function and follow the on-screen instructions.
1. Select the vehicle model you’re working on and click on “Read transponder data from working key”.
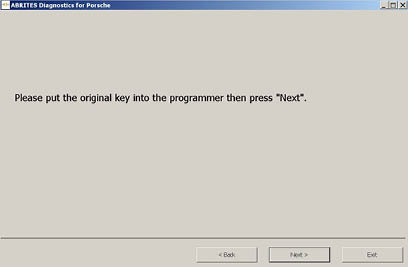
3.Put the original key into the programmer
2. Give Ignition ON with the original key
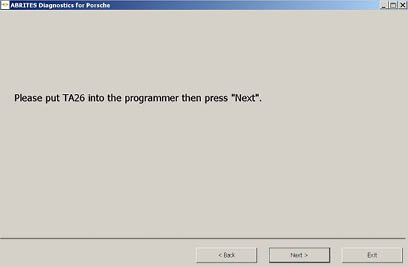
4. Put the TA26 into the programmer
www.abrites.com
www.abrites.com
Abrites Diagnostics for Porsche User Manual
66
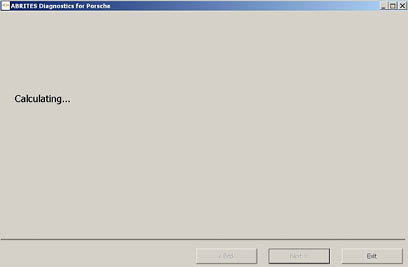
7. Calculating...
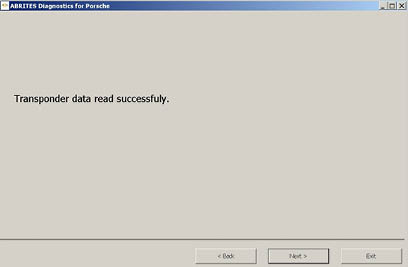
8. Transponder data read successfully
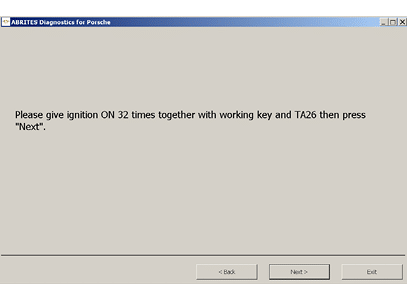
5. Give ignition ON 32 times together with working key and TA26
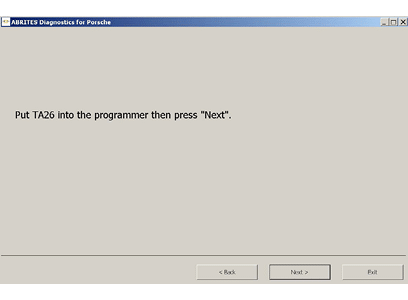
6. Put TA26 into the programmer
66
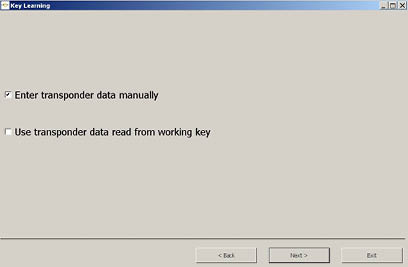
Once the transponder data is extracted, it will remain cached on the computer. However, you need to proceed with preparing the new key as dealer and re-learning the original key together with learning the new key to the car, choosing the desired option. In this case, we need to select the 2nd option (Use transponder data read from working key):
Note: Protag, active AMS, internet connection and preparing the keys as dealer is needed for making the procedure.
www.abrites.com
Abrites Diagnostics for Porsche User Manual
3.4.5.9 Teach key Panamera, Cayenne (2011+), Boxster 981, 911 991, Macan
First you need to read the immobilizer (BCM_Front) with a programmer. You need the DFlash (EEPROM)
from this module.
Then you should load this dump in the software and put the new key into the programmer antenna, so the key is prepared as a dealer key.
Once the key is prepared as a dealer key with the programmer, you should give the number of keys, which you want to learn, i.e. the existing keys + the new key count - so all these keys should be available during the procedure. Keys, which are not present, will be deleted and will not work anymore, until they are relearned again. The software will attempt to connect to the car by OBDII
If you cannot connect to the car, make the lights ON/OFF several times, try to operate the windows, etc. (to wake up the car) .
After connected to the car by OBDII, you will need to put each of the keys (i.e. any existing keys and the new key) into the ignition lock. You will see in the software indication when to put the next key, how many keys are actually learned, and how many keys have to be learned. Such information is displayed also on the dashboard.
When the procedure is completed the remote should work. To make the keyless working, make ignition ON with the plastic key (the dummy key) and press any remote control button.
67
www.abrites.com
Abrites Diagnostics for Porsche User Manual
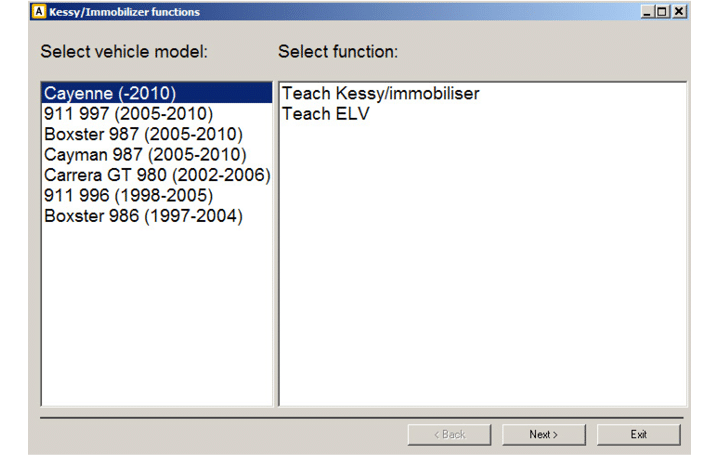
3.4.6 Special function “Kessy/immobilizer functions”
When this function is opened, the following dialog appears:
3.4.6.1 Teach Kessy/immobilizer – Cayenne (-2010)
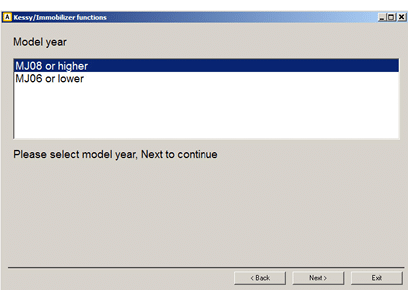
Function “Teach Kessy/immobilizer” for vehicle “Cayenne (-2010)” offers the opportunity to learn a new Kessy/immobilizer module to a vehicle.
The wizard will guide you through the following windows:
First window requires the user to input the model year of the new Kessy/immobilizer module:
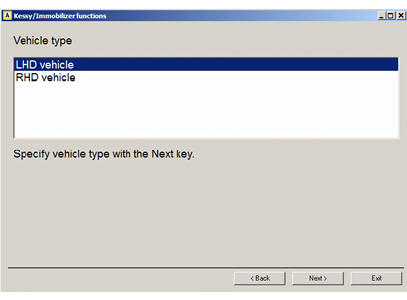
Next window requires the user to input the vehicle type (left-hand or right-hand vehicle) of
the new Kessy module:
68
www.abrites.com
www.abrites.com
Abrites Diagnostics for Porsche User Manual

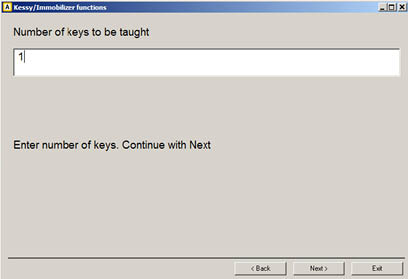
Next window requires the user to input the number of keys to be taught for the new Kessy/immobilizer module. When “Next” is pressed new Kessy module is adapted to the vehicle.
Next window requires the user to input coding configuration of the new Kessy module:
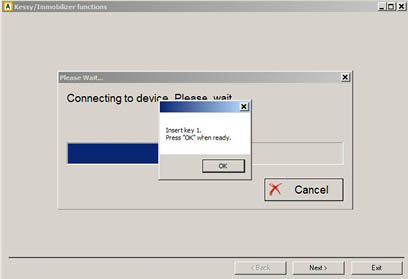
Next window requires the user to put a new key into the ignition lock:
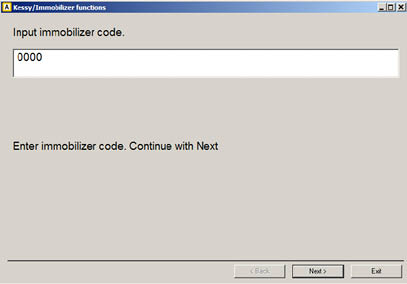
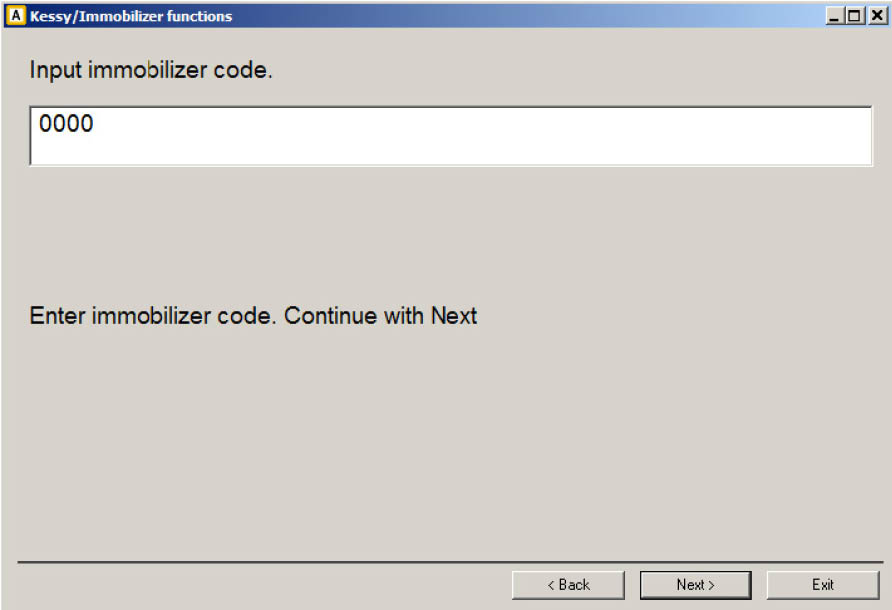
Next window requires the user to input the immobilizer (Login) code of the new Kessy
module:
When “Next” is pressed the input coding is written to the new Kessy and all required keys are learned to the vehicle.
The “Teach Kessy/immobilizer” function is completed.
69
69
www.abrites.com
Abrites Diagnostics for Porsche User Manual
3.4.6.2 Teach ELV – Cayenne (-2010)
Function “Teach Kessy/immobilizer” for vehicle “Cayenne (-2010)” offers the opportunity to learn a new electronic steering column lock module to a vehicle.
First window requires the user to input the immobilizer (Login) code of the new Kessy module:
By pressing “Next” teaching procedure is started.
70
www.abrites.com
Abrites Diagnostics for Porsche User Manual
3.4.6.3 Teach control unit – Boxster 987, 911 997, Cayman (-2010)
Function “Teach control unit” for vehicles “Boxster 987, 911 997, Cayman (-2010)” offers the opportunity to learn a new PAS (immobilizer) module to a vehicle.
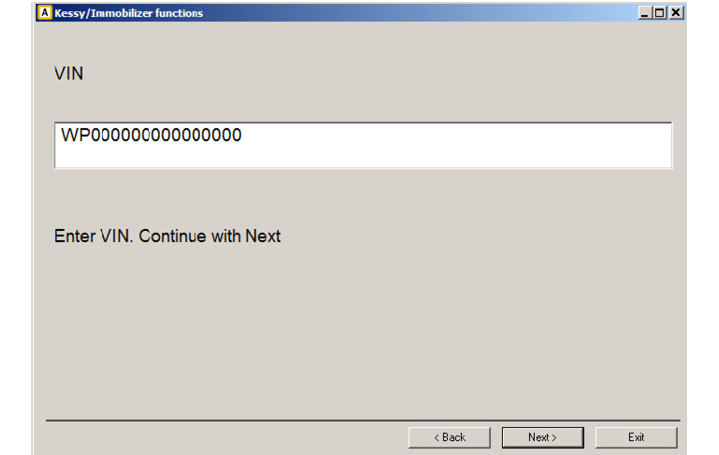
Next window requires the user to input the Vehicle Identification Number:
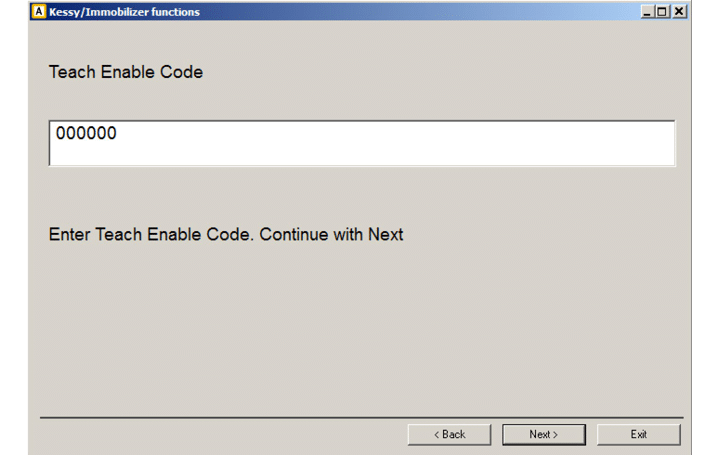
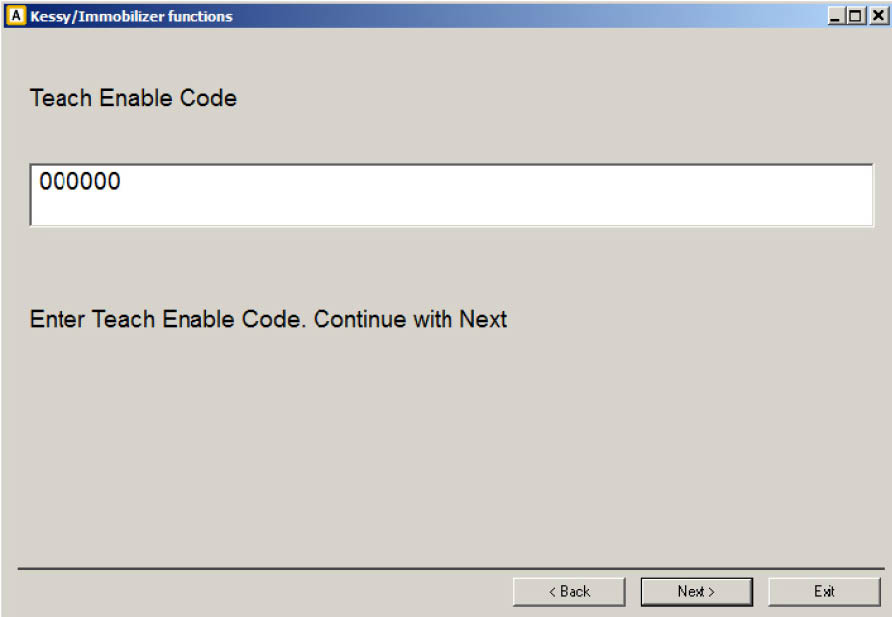
First window requires the user to input the teach enable code of the new
Kessy module:
71
www.abrites.com
www.abrites.com
Abrites Diagnostics for Porsche User Manual
72
72
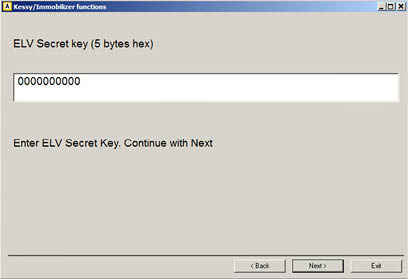
Next window requires the user to input the 5 bytes ELV secret key of the new Kessy module:
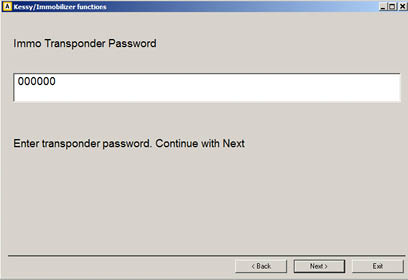
Next window requires the user to input the transponder password of the new Kessy module:
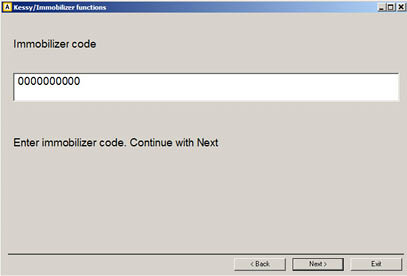
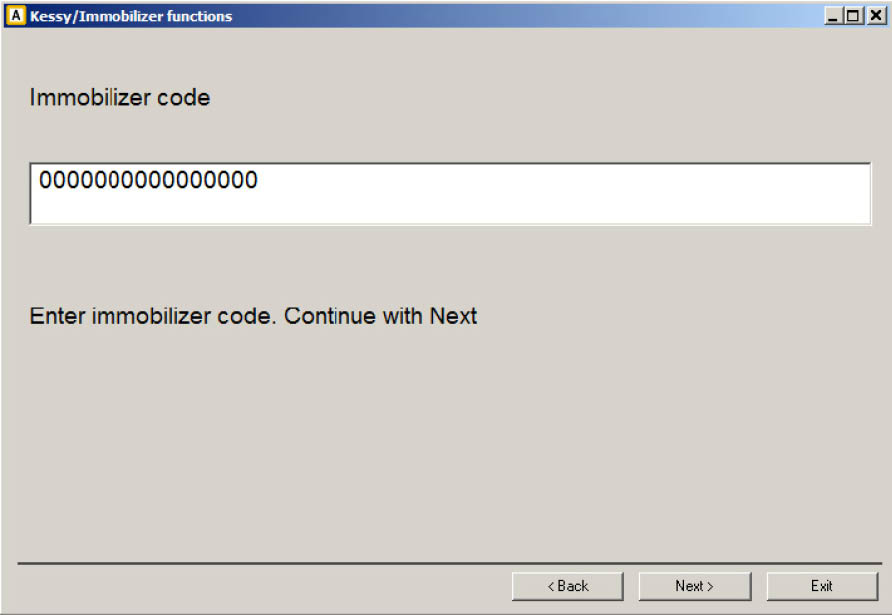
Next window requires the user to input the immobilizer code of the new Kessy module:
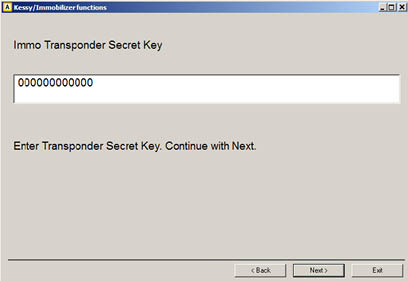
Next window requires the user to input the transponder secret key of the new Kessy module:
When
When “Next” is pressed new Kessy module is adapted to vehicle and all required keys are learned to the vehicle.
www.abrites.com
Abrites Diagnostics for Porsche User Manual
3.4.6.4 Teach electronic steering column lock – Boxster 987, 911 997, Cayman (-2010)
Function “Teach electronic steering column lock” for vehicles “Boxster 987, 911 997, Cayman (-2010)” offers the opportunity to learn a new electronic steering column lock module to the vehicle.
First window requires the user to input the teach enable code of the new module:
By pressing “Next” teaching procedure is started.
73
www.abrites.com
Abrites Diagnostics for Porsche User Manual
3.4.6.5 Teach control unit – Boxster 986, 911 996, Carrera GT
Function “Teach control unit” for vehicles “Boxster 986, 911 996, Carrera GT” offers the opportunity to learn a new or used Alarm module to a vehicle.
The wizard will guide you through the following windows:
When “Next” is pressed Alarm module is adapted to vehicle.
If Alarm module is not new (i.e. is used) you can use the Dump tool special function “Porsche (9x6) - enable Alarm module immobilizer code programming [93C6x)” for to modify alarm’s dump to be ready to be taught. After dump is modified, upload it to the alarm module and start “Teach control unit” function from beginning.
First window requires the user to input the 8 bytes immobilizer code of the Alarm module:
74
www.abrites.com
Abrites Diagnostics for Porsche User Manual
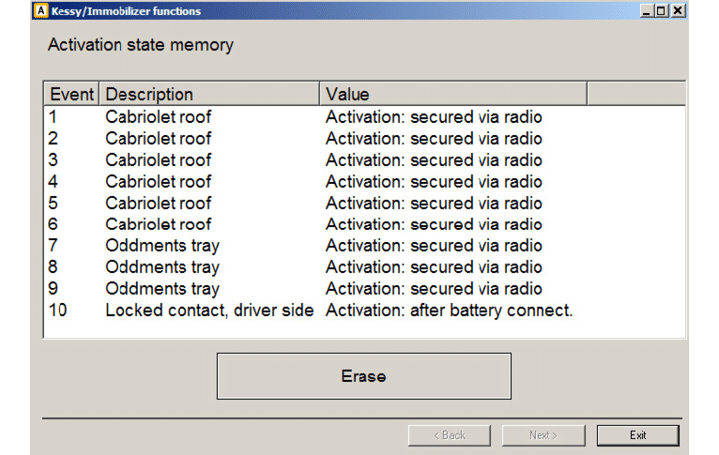
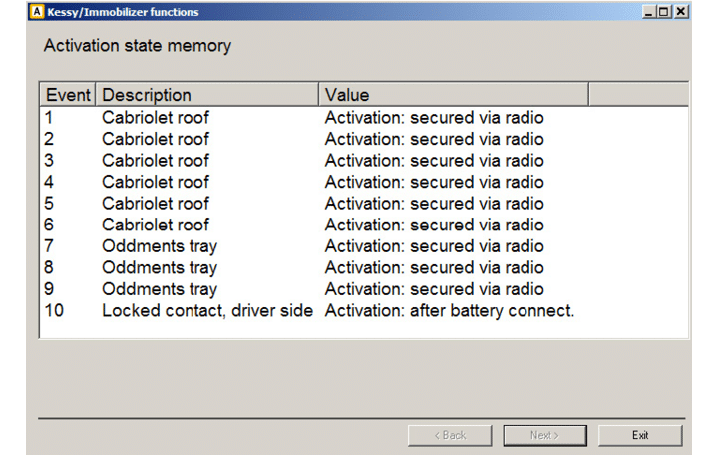
3.4.6.6 Activation state memory – Boxster 986, 911 996, Carrera GT
This function reads the activation state memory of the alarm module.
3.4.6.7 Erase activation state memory – Boxster 986, 911 996, Carrera GT
This function reads the activation state memory of the alarm module and gives the opportunity to delete it.
75
www.abrites.com
Abrites Diagnostics for Porsche User Manual


3.4.6.8 Events– Boxster 986, 911 996, Carrera GT
This function reads the events memory of the alarm module.
3.4.6.9 Erase Events memory – Boxster 986, 911 996, Carrera GT
This function reads the events memory of the alarm module and gives the opportunity to delete it.
76
www.abrites.com
Abrites Diagnostics for Porsche User Manual
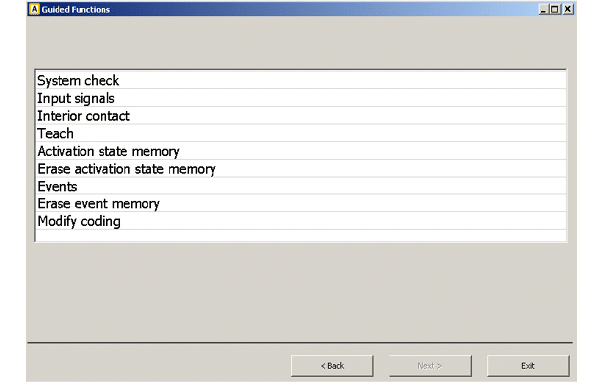
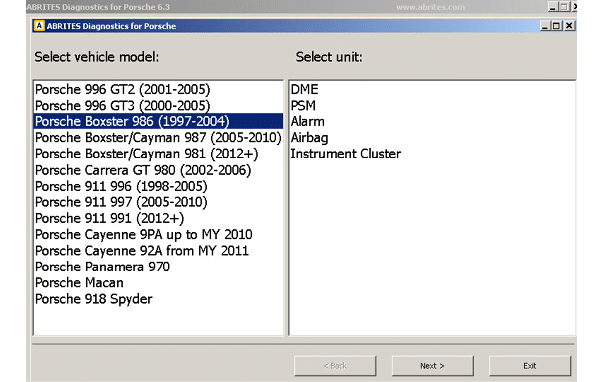
3.4.7 Special function “Guided functions”
The purpose of this function is to give the opportunity to do some specific vehicle maintenance procedures.
Select vehicle model, then select a unit and press “Next”.
Next window will show you all the available functions for the selected unit.
For some vehicle models, before the list of functions is displayed the tester will examine and identify unit’s type automatically by OBDII.
For example if vehicle model “Porsche Boxster 986 (1997-2004) is selected and unit “Alarm” the following list of functions will be displayed:
77
Note: Some of the functions require internet access.
Select the desired function, press “Next” and the procedure will be performed.
www.abrites.com
Abrites Diagnostics for Porsche User Manual
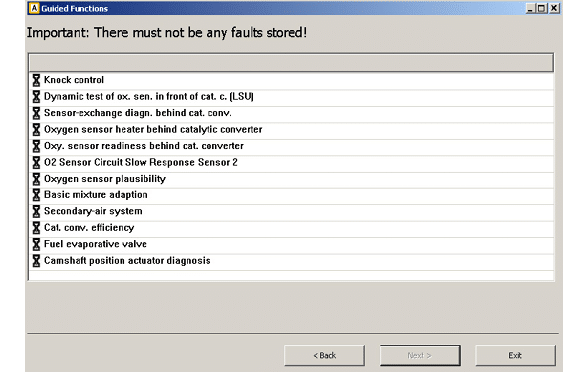
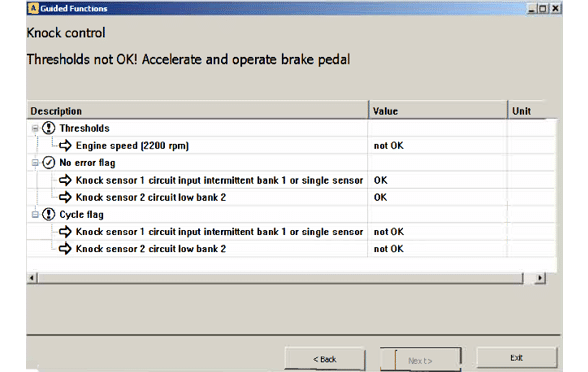

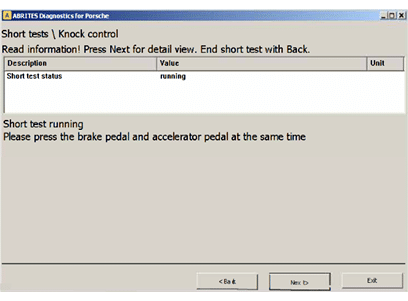
Here is an example with function “Short tests” for unit DME ME78 of Boxster 987:
78
www.abrites.com
www.abrites.com
Abrites Diagnostics for Porsche User Manual

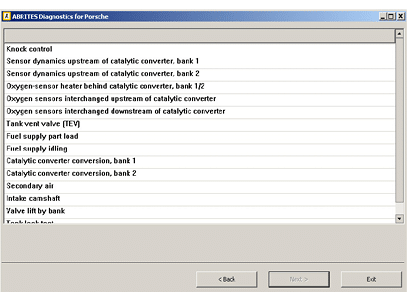
Here is an example with function “Short tests” for unit DME SDI6 of Panamera:
79
79
www.abrites.com
Abrites Diagnostics for Porsche User Manual
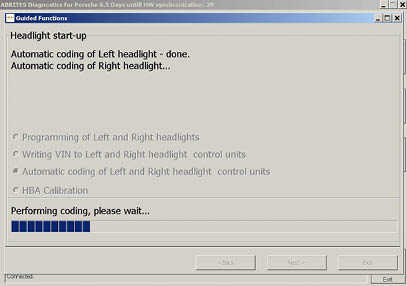
Panamera 970, Cayenne 2011+, Boxster 981, 911 991, Macan Head lights start-up
This function allows you to adapt new or used headlight units to the vehicle.
When headlight is selected (left or right) and “Next” is pressed the software will examine the vehicle’s configuration and decide which steps are needed to be executed for to headlight units start-up.
These steps might include: “reprogramming of the headlight control unit (left and/or right), “writing Vehicle Identification Number (read from vehicle) into the headlight control unit, automatic coding of the headlight control unit (default coding calculated on the basis of the vehicle configuration), Head Beam Adjustment calibration.
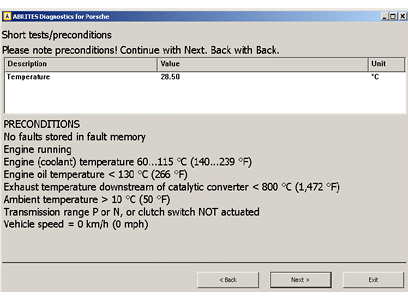
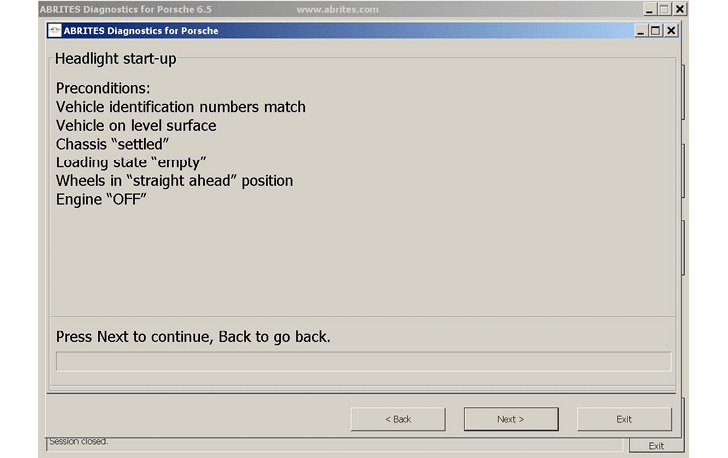
After vehicle configuration is read, the next window appears to inform the user about the preconditions
which has to be met for the procedure to proceed normally.
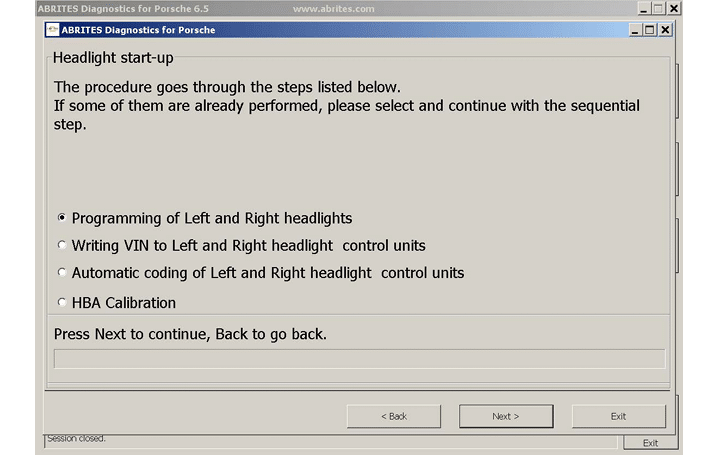
Press “Next” to go to the page where steps to be performed are listed.
In some cases no action will be needed to start the headlights units.
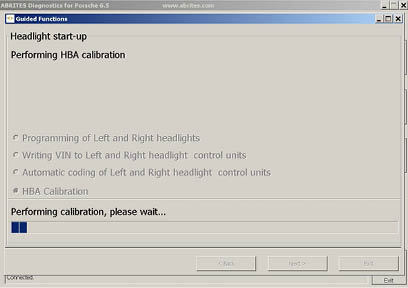
In some cases there will be needed only Head Beam Adjustment calibration.
In some cases there will be needed coding, writing VIN and Head Beam Adjustment calibration.
In some cases there will be needed coding and writing VIN.
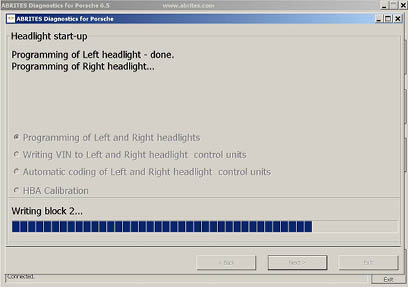
In some cases there will be needed to go through reprogramming, coding, writing VIN and Head Beam Adjustment calibration.
The sequence needs to be followed as given from up to bottom. Upper steps can be skipped if they have
already been performed.
80
www.abrites.com
Abrites Diagnostics for Porsche User Manual
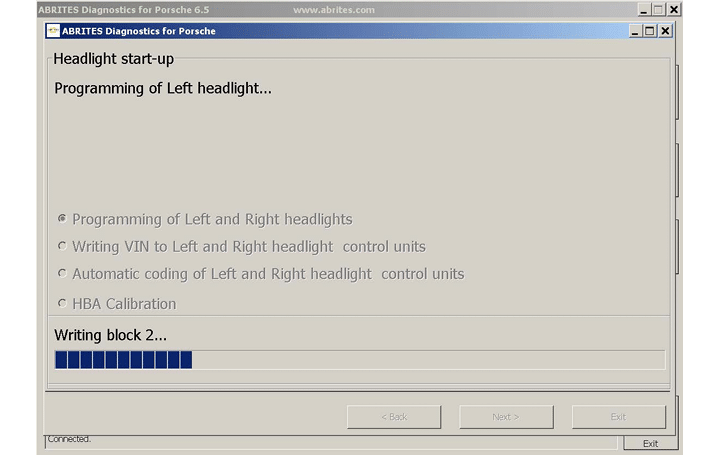
In the example below all reprogramming, coding, writing VIN and Head Beam Adjustment calibration are
given.
Select a step and press “Next” to execute it.
The program will inform you for the progress of the execution.
81
www.abrites.com
www.abrites.com
Abrites Diagnostics for Porsche User Manual
82
82
www.abrites.com
Abrites Diagnostics for Porsche User Manual
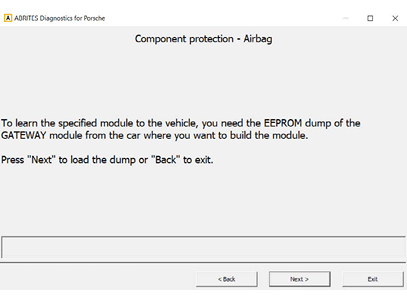
3.5 Component protection
In some Porsche models there are modules which have the so called “Component Protection” security implemented.
Such modules placed in another vehicle activates the “component protection active” DTC and have restricted functionality.
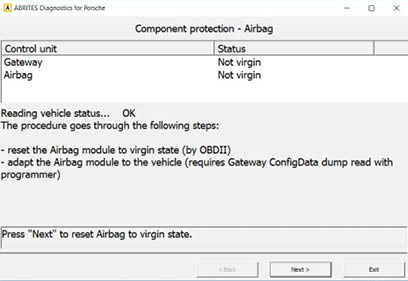
Into Cayenne 9PA such modules are the Gateway (the master) and the Airbag (the slave).
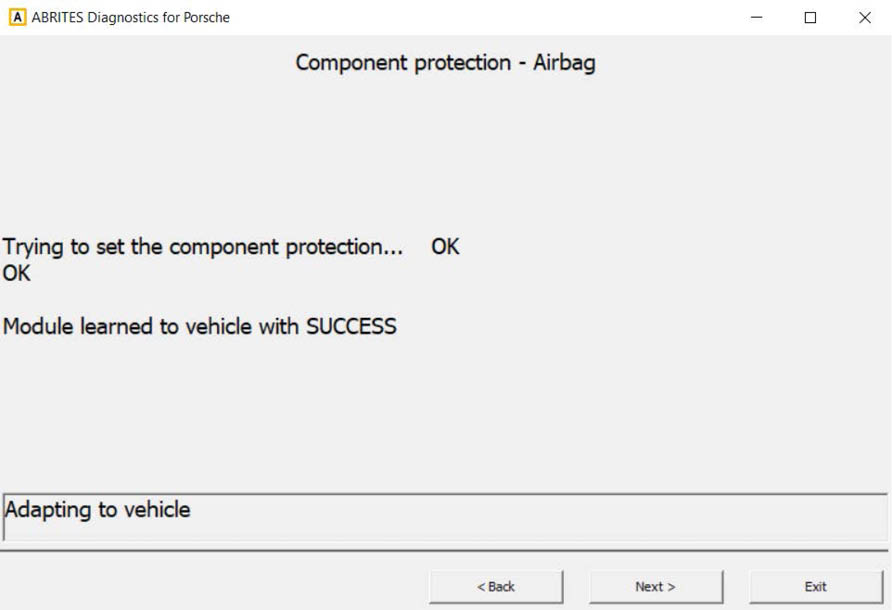
This special function allows to remove the “component protection active” trouble code and allows the module to work with its full functionality as adapting the “slave” modules to the “master” module.
When the special function “Component protection” is started the system is examined and the state (“Virgin” or “Not virgin”) of the modules with component protection is displayed.
In case the state of the module is “Virgin” it can be directly adapted using the ConfigData dump of the “master” Gateway read with programmer.
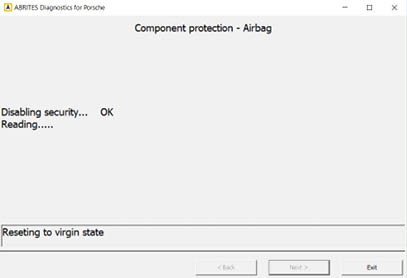
Or if the state is “Not Virgin” then the “slave” module must firstly be set to “Virgin” state (by OBDII) and then adapted using the ConfigData dump of the “master” Gateway.
Below you can find a couple of screenshots of the procedure:
83
1. Gateway and Airbag Status
2. Resetting the Airbag to a virgin state
www.abrites.com
www.abrites.com
Abrites Diagnostics for Porsche User Manual
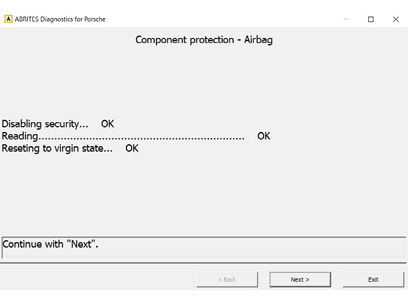
3. The unit is now virgin
4. To learn the unit, load the Gateway dump from the car
5. The unit is now successfully adapted to the car
84
84
www.abrites.com
www.abrites.com
Abrites Diagnostics for Porsche User Manual
85
85
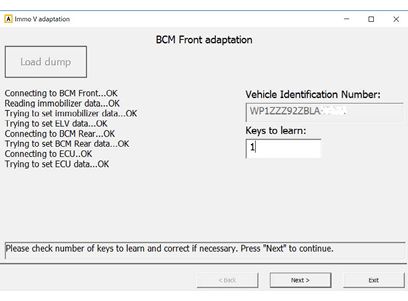
3.6 Immo V adaptation
Into the Porsche models Panamera, Cayenne 9PA, 911 991, Boxster 981, Macan, Spyder there are several modules part of the so called immo V system.
In all of these models these modules are “BCM Front”, “BCM Rear”, “ELV”, “DME” and in Macan also the “Transmission” module.
If you take one of these modules from one vehicle and put it into another vehicle they will not function properly till they are “learned” to the vehicle (or to the master module “BCM Front”).
For example new engine ECU will not start the car, new ELV will not unlock the steering, new BCM Rear will not perform it’s functions and new BCM Front will stop all of these functions and more untill all the rest of the (slave) modules are adapted to it.
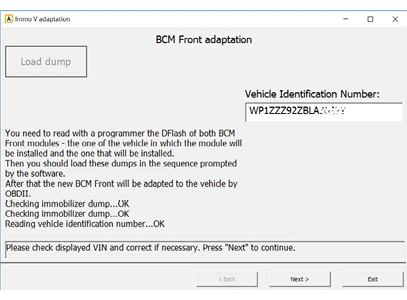
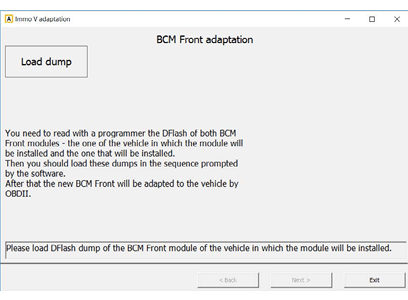
The “Immo V adaptation” special function allows you to exchange each of these modules in a vehicle, i.e.
learn/adapt it to the master module BCM Front. That is why for all of the modules you have to provide the
DFlash dump of the BCM Front module of the vehicle into which the module will be installed.
You need also the ConfigData dump of the new module or DFlash dump of the BCM Front module of the
vehicle from which the module is taken (called donor vehicle).
1. Load the necessary dumps
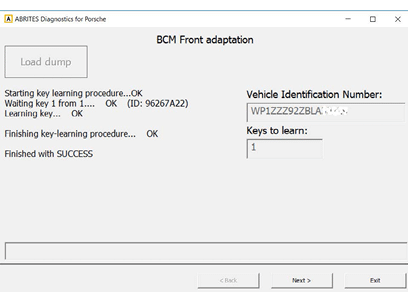
BCM Unit adaptation:
3. Enter the number of keys to be learned (leave “0” if there is no need to learn new keys)
2. Enter the VIN of the car
4. The procedure has successfully finished
www.abrites.com
www.abrites.com

Abrites Diagnostics for Porsche User Manual
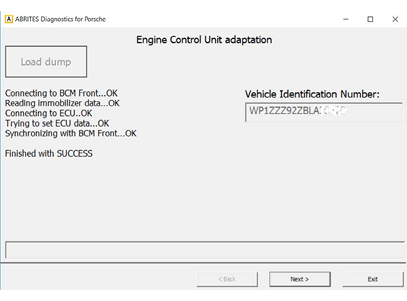

1. You can choose one of the 3 options to make the adaptation
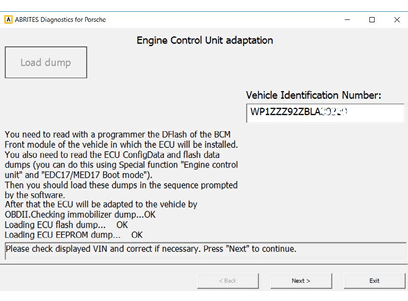
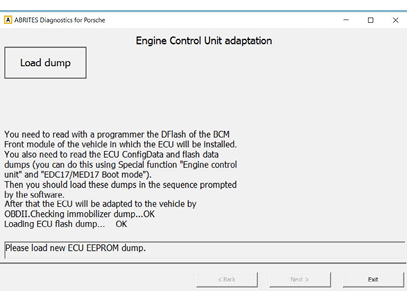
ECU Adaptation:
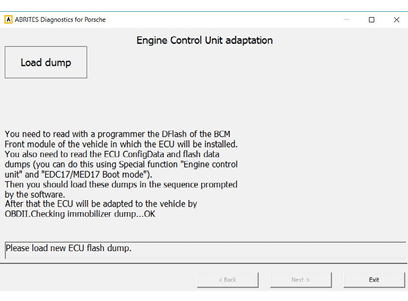
3. Loading ECU flash dump
5. Make sure the VIN corresponds
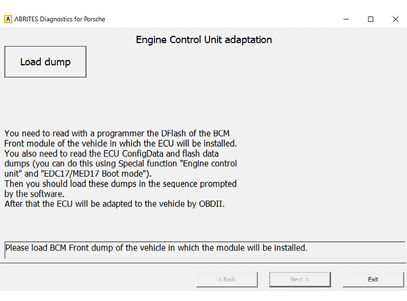
2. Loading the dump from the front BCM of the car
4. Loading ECU EEPROM dump
6. The procedure has successfully finished adapting the ECU
86
86
www.abrites.com
www.abrites.com
Abrites Diagnostics for Porsche User Manual

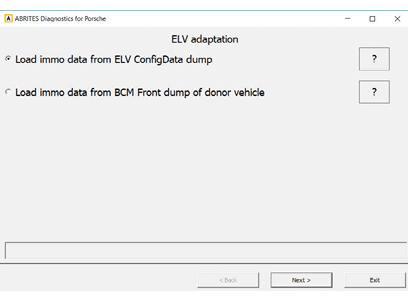
1. You can choose one of the two options to make the adaptation
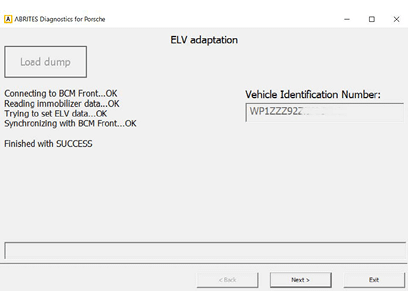
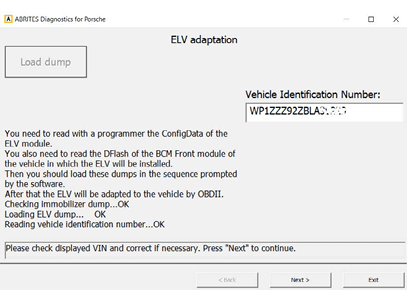
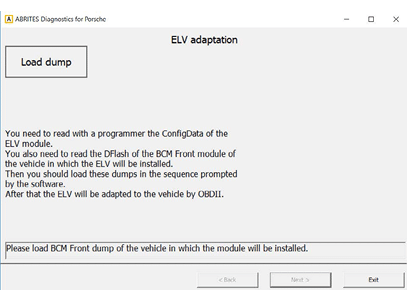
ELV Adaptation:
3. You can now load the ELV EEPROM dump
5. The ELV is now successfully adapted
2. Load the dump from the Front BCM module of the car
4. Make sure the VIN corresponds to the one of the car
87
87
www.abrites.com
Abrites Diagnostics for Porsche User Manual

3.7 Special Function “Read/Update ConfigData”
The Read/Update ConfigData function allows read/update by OBDII the ConfigData [95640] of “Airbag” unit for vehicle model “Cayenne 29A from MY 2011”. Also supports clear crash data by OBDII of “Airbag” unit for vehicle model “Cayenne 29A from MY 2011” with ConfigData type [95640]:
88
www.abrites.com
Abrites Diagnostics for Porsche User Manual
Below you can find a list of typical problems and how to solve them:
Problem: When starting the “ABRITES Diagnostics for Porsche” on the splash screen “Interface NOT found” is displayed
Solution:
Problem: When starting the “ABRITES Diagnostics for Porsche” “Interface not calibrated” is displayed.
Solution: Send all logs to a distributor
Problem: The device connects sometimes to the device under K-Line, and sometimes not.
Solution: Try to increase/decrease the “Wakeup echo delay” timing parameter.
Problem: The connection with the device under K-Line is unstable.
Solution: Try to increase/decrease the “Inter byte time”, “Time between messages” and “Communication echo delay” parameters.
Problem: It is not possible to connect to a device through the K-Line, since it is possible to connect to it with other diagnostic tools.
Solution: Try to change the baud sequence to 9600/10472 from the options dialog.
Problem: Some device cannot be read or unexpected behavior was found
Solution: Send logs from the communication to a distributor with short description of the problem.
89
4. TROUBLESHOOTING
www.abrites.com
Abrites Diagnostics for Porsche User Manual
5. APPENDIX
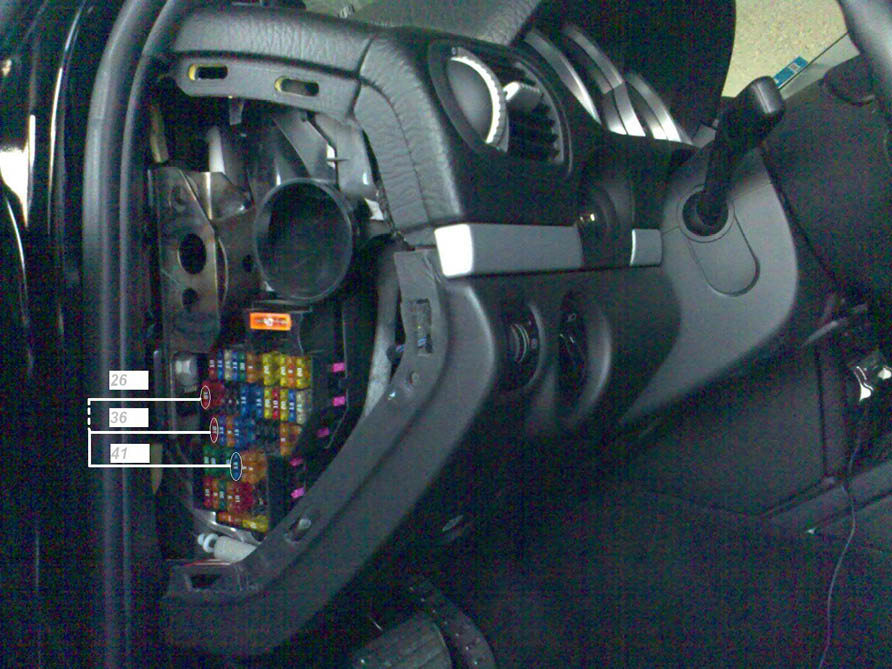
5.1 Porsche Cayenne gasoline engines – ECU wakeup fuses
Porsche Cayenne – fusebox
90
www.abrites.com
Abrites Diagnostics for Porsche User Manual

91

5.2 Removing ESL Porsche 911 977, Boxster/Cayman 987
www.abrites.com
Abrites Diagnostics for Porsche User Manual
5.3 PORSCHE KEY LEARNING BY DUMP
When learning keys to a Panamera 970, 991, Boxter/ Cayman 981, Cayenne 92A, Macan 95B vehicles the first thing that needs to be done is to ensure that the Front BCM is located and that the Dflash (EEPROM) from this module is read with a programmer. Once you read the Dflash (EEPROM) you need to save it locally on your computer in a folder so that you know where it is located.
Once you have done that the next step is to connect your AVDI to the vehicle and your TAG programmer or PROTAG to the AVDI.
Having completed this step you can continue.
92
www.abrites.com
Abrites Diagnostics for Porsche User Manual
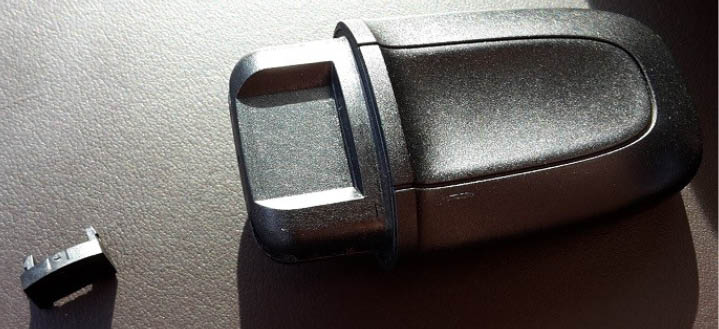
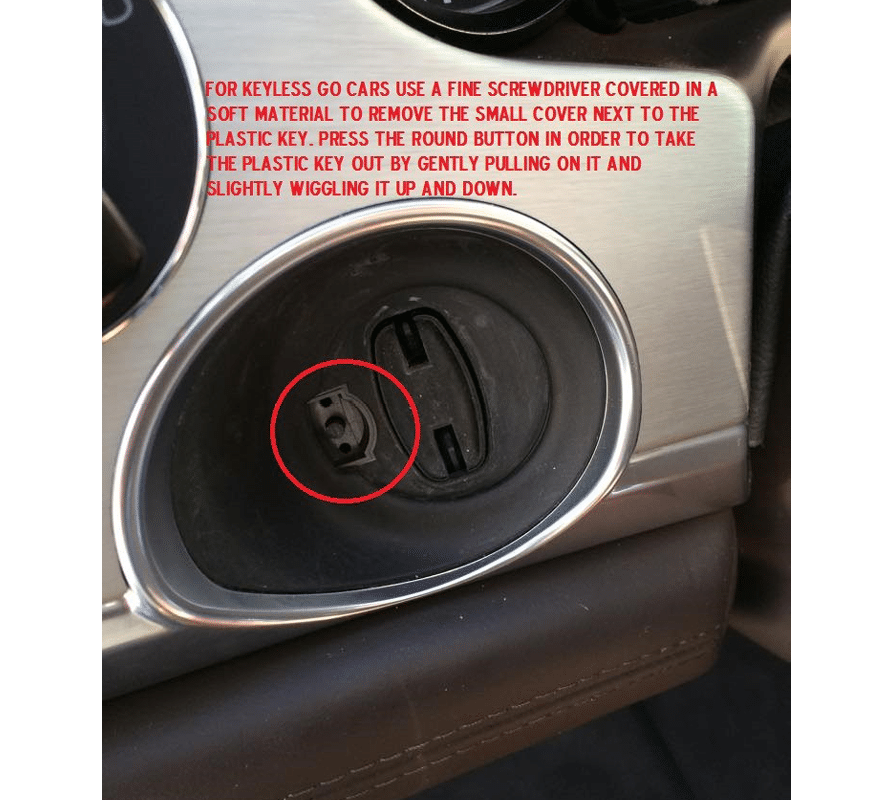
You should take out the plastic key. When you are done you should end up with this:
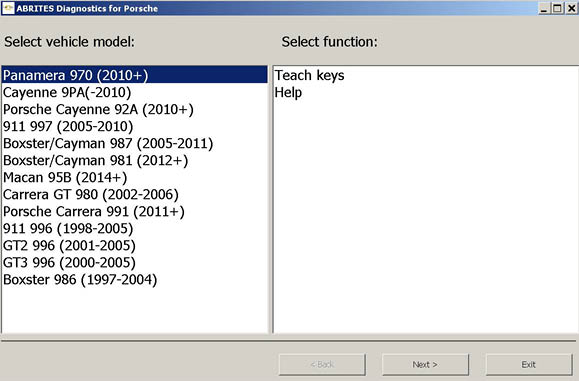
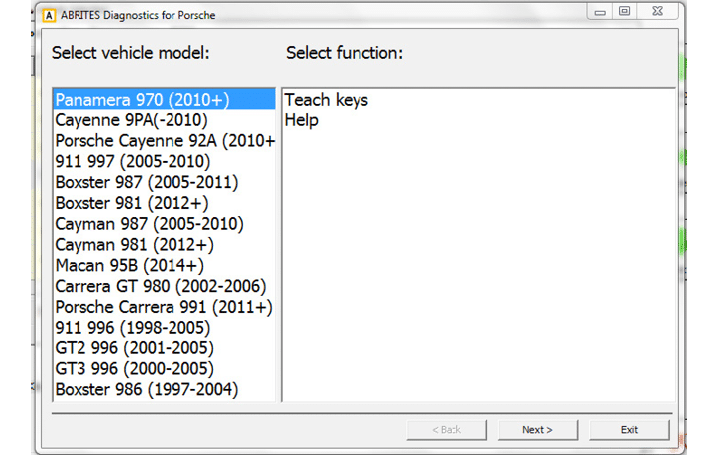
Having completed this step the software can be started. Please select key learning.
When you open the key learning menu you can select Panamera 970 (2010+). This will open a menu with two options: Teach keys and Help. The help option will give you an overview of the steps you need to take. Please read them. When you are finished you can go to Teach keys.
93
www.abrites.com
Abrites Diagnostics for Porsche User Manual

The Abrites diagnostics for Porsche will ask for the dump you have saved in the beginning of the process.
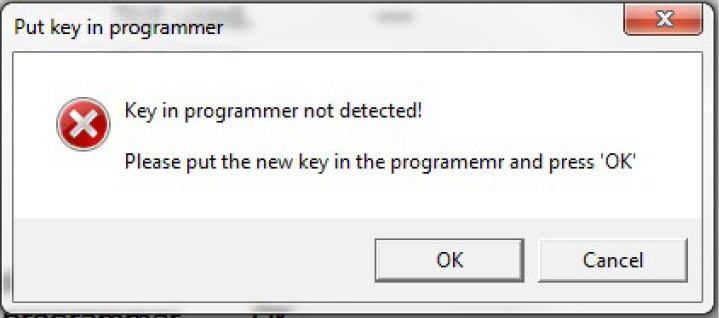
Click on the load dump button and select the dump you have saved. It is at this time that you should put the key in the TAG programmer or PROTAG. Otherwise you will see this message:
94
www.abrites.com
Abrites Diagnostics for Porsche User Manual
The process is automated and requires minimal input.
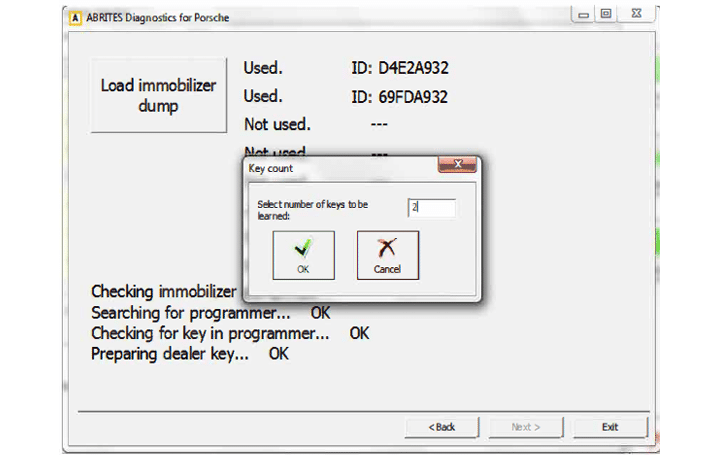
Once the key is detected in the programmer its preparation as a “Dealer key” begins.
When this is done you should select the number of keys you want to learn:
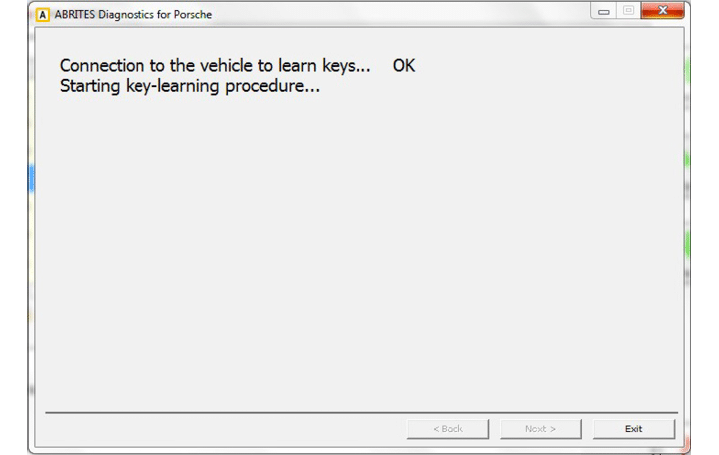
The key learning starts. In case it does not – turn the light switch ON and OFF, lock and unlock the car, etc.:
95
www.abrites.com
Abrites Diagnostics for Porsche User Manual
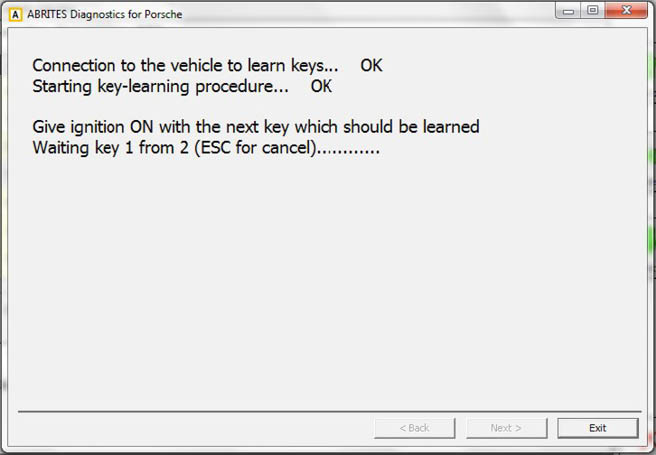

Place one of the keys in the vehicle’s key fob which you have previously prepared as per the instructions above and set the car to the “Ignition ON” position:
96
www.abrites.com
Abrites Diagnostics for Porsche User Manual
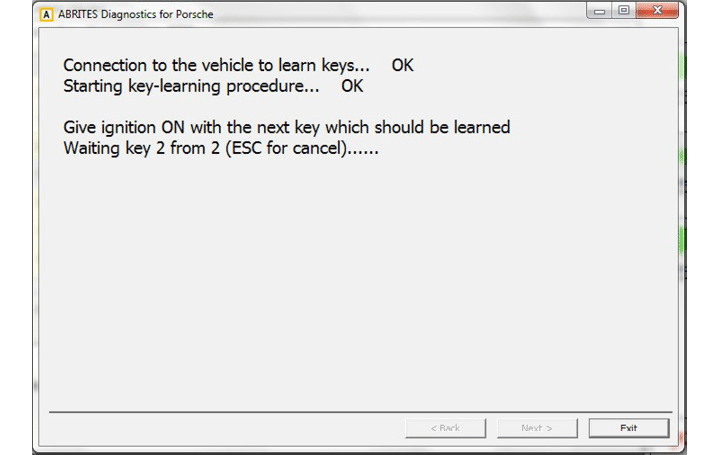
Repeat the same procedure for the second key.
The procedure will finish with success and the car will have two working keys. So will the remote controls. They sometimes require you to lock and unlock the vehicle several times.
In order for the key less function to work please reassemble the plastic key (reverse of disassembly) and turn it on while pressing the buttons for locking and unlocking on the remote controls.
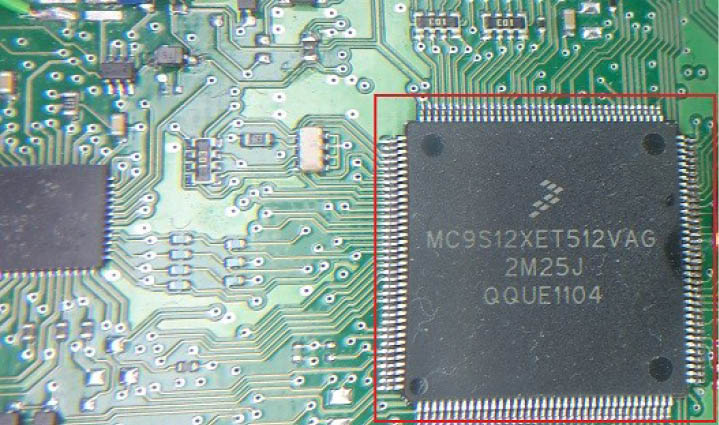
NOTE: This is the processor you need to read:
97